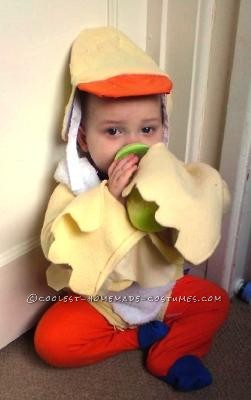
As a single mom with very little income there wasn’t much I could afford to buy. However, I wanted my son (less than a year old) to interact with other children for Easter so when I saw the local theater was hosting a holiday party for the little ones for a fiver I thought we could handle that. After getting our ticket I realised it was a costume party. Considering my options of Easter themed costumes and that he was a baby I eventually settled on a duck because he loved ducks.
Working on a budget I had worked with what I had in the house. Also working with no previous clothing or costume sewing experience. Items previously purchased for other reasons for fairly cheap were then recycled for use on my sons duck costume. These items were:
1. A baby hat with bill and under chin strap – originally purchased at charity shop for £1.50. This one be the head and face (though some how I never attached the eyes which you’ll see)
2. A red bow tie you slide on a dog collar – originally purchased for puppy Christmas decoration at the £1 store.
3. A fresh and fluffy burping towel – originally purchased for that purpose at the £1 store. Used as the belly and collar of the duck.
4. Yellow fleece that was part of a blanket made years ago – it was purchased just as Walmart fabric for I think $6. This would be for his body and feathers.
5. Two part legs: Originally I used some orange fabric I covered my table with at Halloween. However I misjudged the width and couldn’t get them to go over his thighs. So I had to default to using a pair of Tigger pjs that were orange under his costume for legs.
Putting it together with no pattern:
I eyed the costume the entire time changing it as I went along and trying to figure out how to do it without wasting material I had so little of.
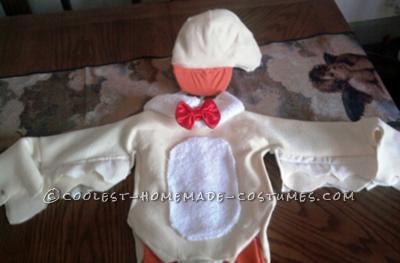
First things first, I went the easy route. I knew I wanted the hat which was plain white to be the head and set to sewing the orange fabric to the bill as well as the fleece to the cap portion. I machine sewed this – NOT EASY … due to the shape and my lack of experience at the time. I had cut two oval white pieces and black marked in some pupils but somehow never attached them.
Next, how to get the body done? A little one who was squirmy and really didn’t like the idea of mommy measuring him. So I found a baby vest (onesie) in the next size up from his room. I used this as a pattern to cut out the appropriate size and shape. I folded my large fleece fabric in half and cut the pattern out. using the fold in the fabric as the place for shoulders… however I DID NOT cut the arms at that point. I cut a place for his head in the fold and threw it over him, raised his arms for measure and pinched the place where the tip of his fingers stopped. I cut the fabric there as his sleeves.
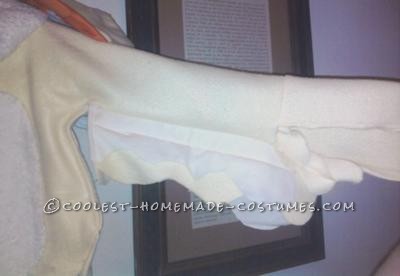
Next I cut two identical pieces of ‘flare’ sleeves with wavy hem to attach to the end of his arms which would flop over his hand but loose enough to allow him to still grasp things with his hands… hoping it would give the impression of feathers. To further this I used 4 pieces of fleece and 4 pieces of scrap material of an offwhite/yellow tint. I cut all 8 into strips, flat on one side and wavy on the other. I placed them as fleece, fabric,fleece fabric and sewed them together (making it 4 pieces. I then sewed them onto one side of the sleeve that still was unsewn). Once both sleeves were done identically I moved to the next step.
I cut an oval out of the burp cloth and then sewed it to the belly of the costume. Using the left over burp cloth material I sewed a collar onto the fleece neck whole. I then flipped the fold so the outside of the costume was inside and sewed everything closed (the sleeves and sides.) I DID NOT sew the bottom as I planned to pull it over his head. While sewing the sleeves I added a few teardrop shaped fleece pieces intended to resemble feathers to the wrist of the costume.
With my costume still inside out I used iron on hem to attach the snaps to the costume from old onesie that I had cut off the bottom of them. Once cooled and secured I flipped the costume inside out and tugged and pulled to properly shape it including popping a few stiches that didn’t sit correctly. I then cut to slits into the collar where I would stick the bow tie, part of tie through the top slit and part through the bottom slit and secured with velcro.
The body was fitted and the sleeves were floppy so he had little feathers. For never having made any clothing or costume before and having to use what I had in the house I was pleased and have had good experiences with more complicated projects (though not clothing) since. (he still doesn’t like anything on his head so the hat isn’t secured in the photo)

Related costumes:
 12 Coolest Homemade Parrot Costume Ideas
 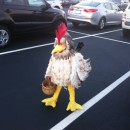 A Chicken So Realistic, She Almost Laid an Egg!
 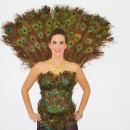 Amazing Peacock Costume – Entirely Homemade!
  Top 10 Stunning Homemade Peacock Costumes to Inspire Your DIY Costumes
 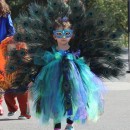 Beautiful Peacock Costume for a 3 Year-Old Girl
 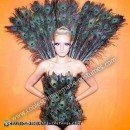 Linda’s Awesome Homemade Halloween Peacock Costume
 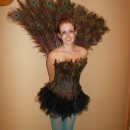 Sexy Homemade Peacock Halloween Costume
 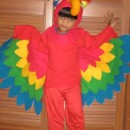 Coolest Child Parrot Costume
Your comment has been sent successfully.