This awesome Backhoe Loader Preschool Halloween Costume was put together with 7 “ingredients”:
- 3 paper boxes
- 2 cans white primer spray paint
- 2 cans yellow spray paint
- 2 cans black metallic textured spray paint
- One million hot glue sticks
- Yellow duct tape for wheel stability and for emergency repair on Halloween night
- Black fabric straps
And 4 tools:
- Exacto knife
- Ruler
- Mechanical pencil
- Hot glue gun
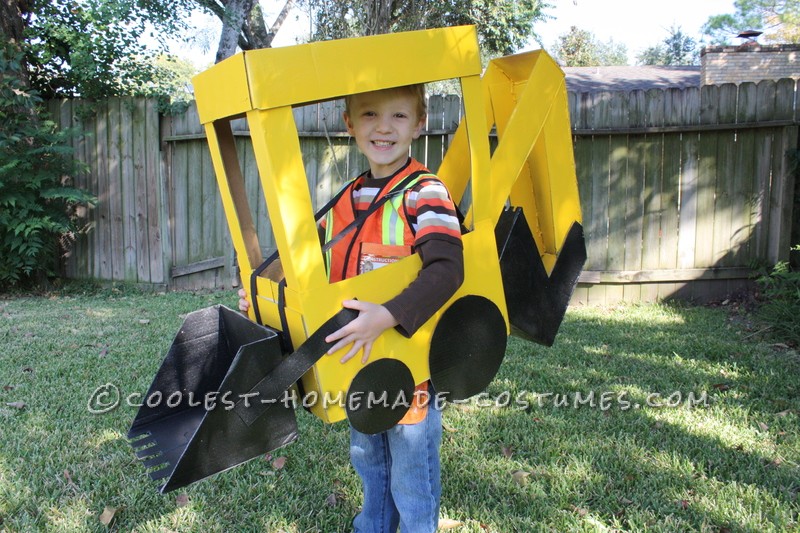
My 4 year-old son absolutely loves construction equipment, and I wanted to make him an unforgettable costume so I decided to try to make a backhoe loader. I have never done anything like this in my life, and I do not consider myself crafty. Paper boxes proved to be perfect because they are sturdy and were well-sized for my needs.
To make the body of the backhoe loader where my son would stand, I simply cut the bottom out of one of the boxes. In hindsight, I might have cut out an opening and left some of the bottom as a rim just to make it sturdier, but this worked fine.
To make the front shovel, I used the bottom portion of one of the boxes, angling and cutting it shorter than the original box height. Then I cut the teeth in the front. I constructed a little spacer that held it out from the body of the backhoe just by folding a rectangle-ish shape out of some leftover box. I cut simple strips of cardboard to be the arms to the front shovel. I used 2 bowls to trace the wheels and cut out the 2 front wheels and 2 back wheels.
The back shovel was a little more challenging for me because I really have horrible spatial abilities. I made the back scoop again by using the bottom of a paper box, because it gave me a convenient and sturdy right-angled bottom to the scoop. I used a pencil to trace out the shape I needed (about 5000 times of me holding it at various angles and comparing to one of his backhoe loader toys—spatial challenges!) I needed it to be a narrower scoop though than the front one that was the width of the box. So, I cut it to the width I wanted, which left an open side and I cut out a flat piece to close it in. For the arm of the back shovel, I used strips from the sides of the box lids and then cut a wider piece to close off the back of the arms. I thought about skipping that part (it was late by now!), but it was needed for stability and definitely improved the look.
By this point I realized I was going to be able to do this, so I showed my son the work in progress the next morning. How rewarding when he blurted out “a backhoe loader!” even with it not yet painted or fully glued together. It also had no cab, which I’d wanted to do but thought perhaps I could get away with skipping. But he said right away, “but where’s the cab? Can you make it have a cab?” I had wanted to anyway and knew it’d look better, so a cab I made. That actually proved pretty easy.
I got myself a 3rd paper box and just used the lid for the top of the cab. This was sturdy and already perfectly sized. For the sides of the cab to hold up the top, I cut alongside the bottom of the paper box to make essentially two “L” braces. I used these on the front since they were the most sturdy, and it worked great. If I’d had another paper box I would have cut 2 more just like it, but I didn’t, so for the back part of the cab I just used the 2 strips of cardboard with a fold at the top cut from the other part of the box. This worked fine, but was certainly flimsier, so 4 of the “L” pieces really would have been ideal. But, ta-da, after hot gluing everything together, I had a cab.
I primed and painted the component parts, painting the respective parts yellow or black. This took a couple of coats, but that was not helped by doing this at night in my back yard. I had already glued together the back shovel, so that was the hardest painting part since the bottom was black and the arm was yellow. Would’ve been better to paint first and connect later, but I needed to see it come together since I couldn’t quite envision it in my head.
Everything was attached with hot glue. Lots and lots and lots of hot glue. The front shovel was glued to the spacer, which was glued to the body of the box. The strips were glued along the sides, which provided some stability but mostly served to cover the spacer and for aesthetics. The back scoop was already hot glued to put it all together. I cut 2 slits in the back of the body of the costume and fit the back scoop down into them and then hot glued those.
I had wanted the back shovel to be held out away from the body of the backhoe, but sturdiness required that the bottom of the scoop rest against the body of the box, so I glued along there too. I glued the cab onto the body of the box. Last, I glued the wheels onto the bottom, and reinforced them with duct tape. FYI. It’s much easier to work with before these are put on because the box will sit flat.
Lastly, I attached the straps. A friend had bought 3 yards of a thick strap-like material at Hobby Lobby for me. I’d intended to just glue this on the inside, but she suggested we wrap it around, which proved wise for stability. I also ended up using large safety pins to pin it keep them from slipping on his shoulders, and this was critical to him being able to wear it for a long period of walking to trick-or-treat.
He already had a dress-up construction worker outfit, so he wore that as a part of the costume. That worked well because at a school event, a carnival, and a friend’s Halloween party he needed to be able to take it off to play and that way he was still in costume.
Overall it was a really cheap costume to make. If I had bought cheap black spray paint instead of the metallic textured it would have been even cheaper. It took me a couple of hours over several different evenings to complete the whole thing, but I am sure that someone more inclined towards such things than I could do it much more quickly.
He wore it trick or treating and had a great time and got lots of compliments. He ended up not carrying his pumpkin bucket because he did tend to hold on to the front of the cab to keep it from slipping around. So, people put his candy in the front scoop, which was cute anyway, and he then brought back to my mom to put in his bucket. I was pleased with how well it held up. His friend tripped and fell once, and my son impulsively threw himself straight down on the front of the scoop on the grass to be silly. This did break off the front scoop at the arms, but I had carried the roll of yellow duct tape in my purse, and a strip on each side later and we were back on our way. The yellow tape was great because you could hardly see it other than across the two black strips.
Trust me…if I can do this, you can! It was so fun to know I had made my son a one-of-a-kind costume that hopefully he will always remember.

Related costumes:
 Super Cool Backhoe Costume for a 3-year-Old (Load On the Treats!)
  Coolest Homemade Backhoe Halloween Costume
  Coolest Backhoe Loader Digger Costume
  The Amazing Scoop and Bob the Builder Costume
 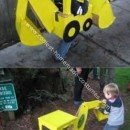 Coolest Child’s Backhoe Costume
 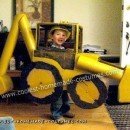 Coolest Homemade Backhoe and Driver Halloween Costume
 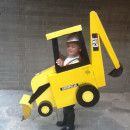 Cool Backhoe Halloween Costume
 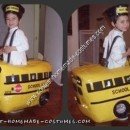 Coolest Homemade Yellow School Bus Halloween Costume
Thank you so much for this post! I have reread it about 50 times as I am creating a backhoe this year! It definitely requires much more time than you would imagine! Kudos to you! Looks awesome!
Thank you so much for this post! I have reread it about 50 times as I am creating a backhoe this year! It definitely requires much more time than you would imagine! Kudos to you! Looks awesome!