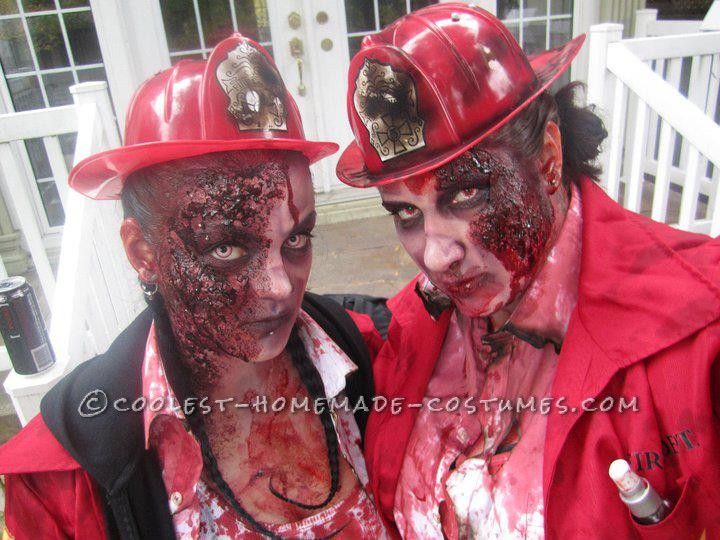
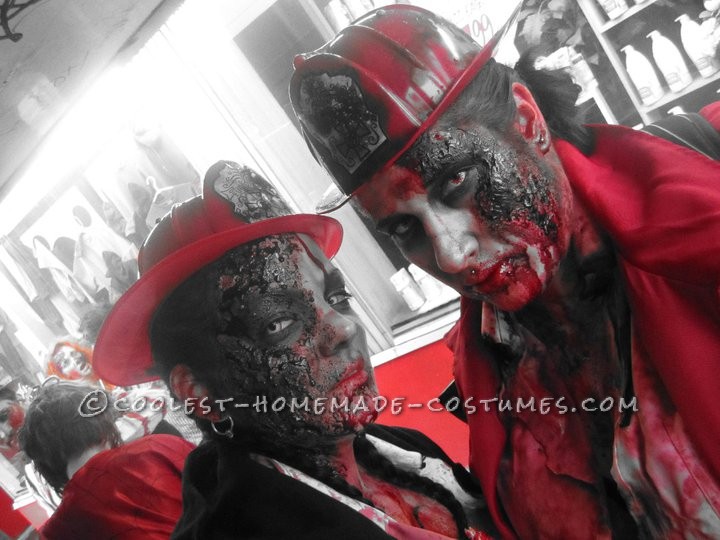
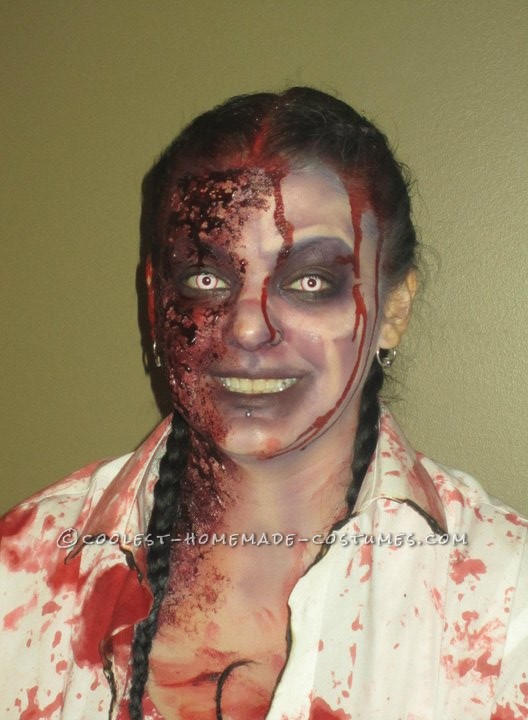
This was actually for one of the Toronto Zombie Walks. My friend and I usually decide to go as a pair or group set of themed zombies, this year was fireman/woman zombies that were half burnt!
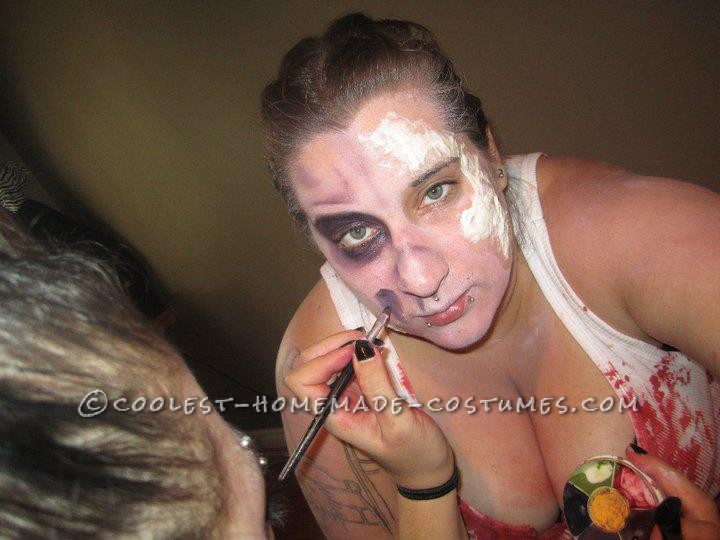
I have the process documented on my friend, as I was doing her makeup.
A few things you will need…
- White wife beater/white dress shirt
- Fireman jacket and hat(you can buy a cheap jacket or make your own!)
- Black pants (I just wore a really long tank top and dress shirt and ripped up black tights. My friend wore ripped black pants)
- Liquid latex
- Toilet paper
- Scab blood
- Fresh stage blood (edible is best)
- Castor sealer is recommended for the latex but not fully necessary
- Clown or buise wheel (you ‘ll need white, red, purple, brown, black and even blue paint is handy)
- Brushes and/or sponges for application
- Contact lenses are optional but an an extra zombie kick!
- And if you are anything like us, it ‘s a great idea to grab a small bottle of body spray, dump some out and fill the rest with blood so you can ‘freshen up ‘ throughout your evening! ;)
….BRAAAIIINNNSSSS!!!! :P
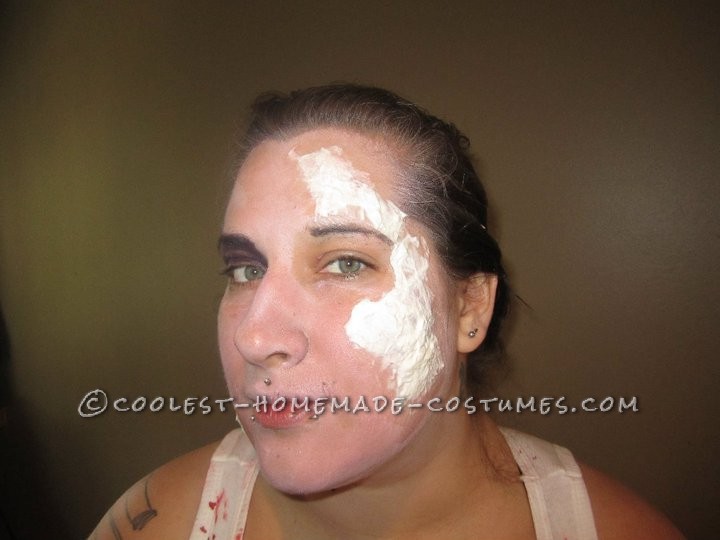
The Base/ Latex
- Make sure skin is washed and dry
- Decide which area of skin will be burnt and tear pieces of toilet paper to cover that area
- Cover desired burnt area in latex and then toilet paper – keep it messy. Since it will be a burn, it ‘s totally cool (in fact, it ‘s desired) to have that area of skin very choppy, wrinkly and even torn/hanging off if you like
- After the latex dries, repeat the process at least 3 or 4 times, finishing with latex. This amount of layers, tears, wrinkles, etc is totally up to you! (obviously just don’t to like 50 layers, it will be way to thick! lol)
- Once all layers are done, apply castor sealer to the latexed areas. This is optional. Castor sealer basically seals the latex and makes it easier to paint, but for this makeup it is not 100% necessary, since all latexed areas will be covered in burnt makeup.
While the latex is drying, feel free to begin your makeup (see step 2) on the part of your face that is not burnt if you like (if you aren’t comfortable with this, just wait for the latex process to be complete before attempting makeup)
Let ‘s be dead! ~Makeup~
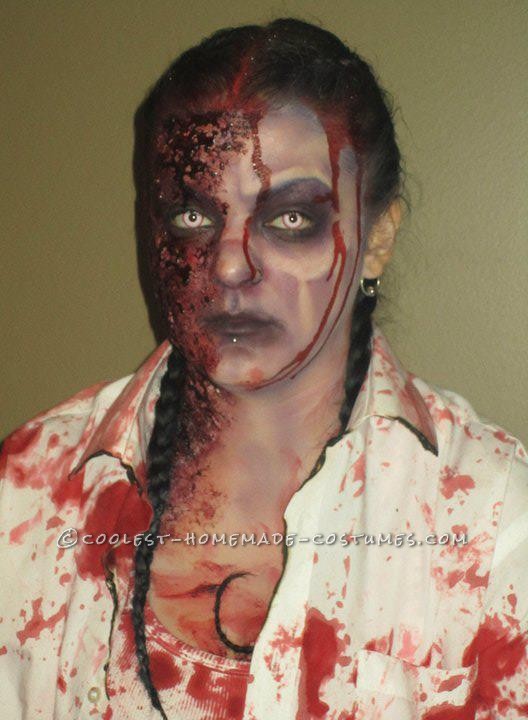
As I said in step 1, you can begin to apply the makeup in between latex layers or wait until the latex process is complete and dry. For this zombie, we went for a semi-skeletal look on the areas that weren’t burnt.
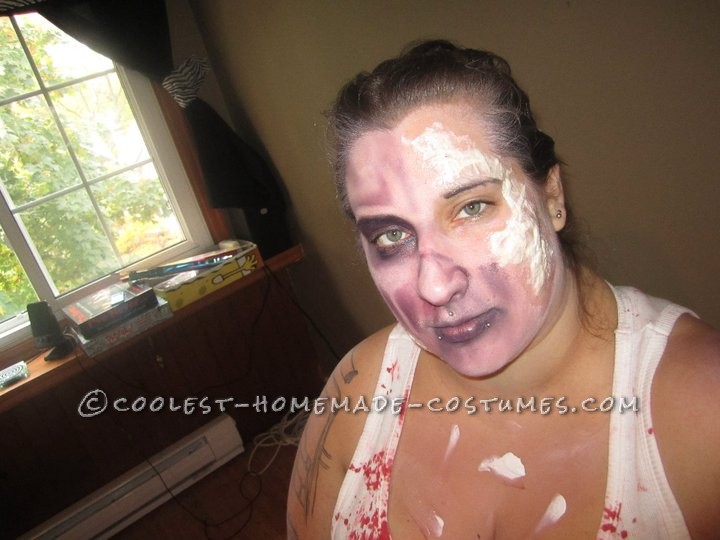
- We used some white to pale the face out slightly
- We then used a mix of purples/blues/blacks to darken all ‘soft spots ‘ on the face. Be sure to blend these areas out, so they aren’t just solid dark spots, they should blend in with the lighter spots
- We also decided to make the lips a dark purple/blue color to make them look cold and dead! When you color the lips, don ‘t worry about keeping them neat and clean, we actually want the color to smear and blend off the lips and onto the face a bit
What are the soft spots to darken?
- Eyes (lids, up to brow bone and under, down to cheek bone)
- Under the cheek bone – in this example, we didn’t do a solid darkening, we did chunks of dark spots
- Next to and beneath the nostrils
- Below the nose bone
- Temples
- Above the brow bone and some on the forehead (see the pictures)
Let ‘s Be Burnt! – ~Makeup~
Make sure your latex is 100% dry before applying any makeup. Applying makeup over wet latex can cause the latex to rip or stick to your brush/sponge and pull the entire application off! :S So make sure it ‘s dry!!!
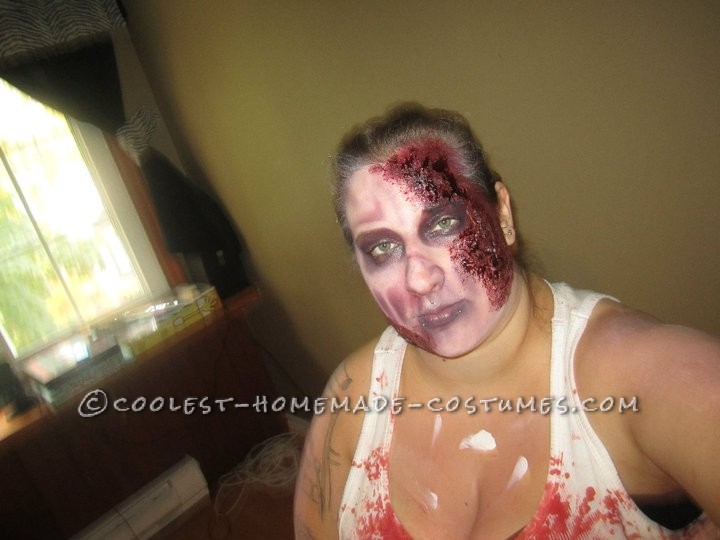
- Paint your burnt area a dark redish/brown color
- Go over top of this with messy black, filling in any dented areas with the black
- Don ‘t worry about any blending for this

Let ‘s Get Bloody!
Now it ‘s time to apply the blood! MWUAHAHAHA… This is going to get messy! :)
- Cover the burnt area in scab blood. This blood is thick and chunky and takes some getting used to as it will sometimes try to stick to the brush. Take your time and work with it. I usually apply it with the opposite (non-bristle) end of my brush. Leave it nice and thick and chunky – that ‘s the point!
- When it comes to the edges of the burn, dab the scab blood around the edges making it thinner (less and less) as you get further away
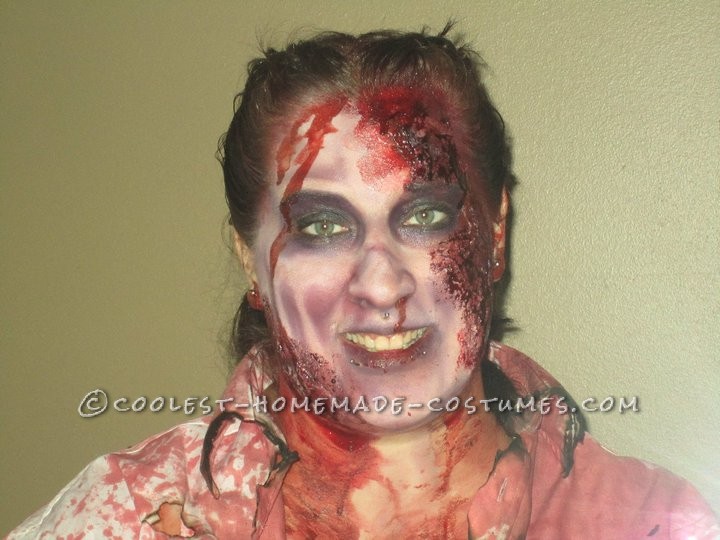
- Once you are satisfied with your burn, add a bit of stage blood to it and let it run down your face and body naturally. You can also put some in your hair/nose/ears (just don ‘t let it run in!)/etc and have it run down your face
- After this, make sure you are bloody and rip up your clothes. You can even burn them (make sure you are outside and have water handy just in case!)
- Also make sure you apply some dark makeup and/or blood to any exposed skin so you don ‘t have any clean spots. Zombies are dirty, after all!
- You can also ‘eat blood’ from your hand to make it look like you just had a fresh meal! You can do this before you head out or even while you’re out and about looking for some BRAAIIINNSSSS :P
You can use the burn effect on your body as well, anywhere you like!

Related costumes:
 750+ Horrifyingly DIY Spooky, Gory, Dark and Scary Halloween Costumes
  Coolest Homemade Classic Movie Monsters Group Halloween Costumes
 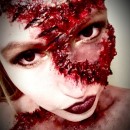 Horrific Stitched-Up Prom Queen Makeup
 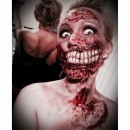 Grotesque Zombie Makeup and Costume
 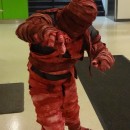 Beware of the Bloody Mummy Homemade Halloween Costume
 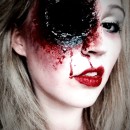 Grotesque Shot Gun Sally Makeup for Halloween
  Dead Masquerade Zombie Couple Costume
 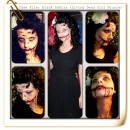 Artist Living Dead Girl Nicole Transforms into the Black Dahlia (Elizabeth Short)
Your comment has been sent successfully.