OH YEAH! Everybody loves the Kool-Aid Man!
I always wanted to make a life size costume version of the Kool-Aid Man and decided this year was the year!
Growing up Kool-Aid was one of my favorite drinks and who didn’t like watching the commercials of Kool-Aid Man busting through walls everywhere he went!
Here is my version of the Coolest Homemade Kool-Aid Man Costume.
Let me know what you think and please check out my other costumes I posted this year.
OH YEAH KOOL-AID MAN!!
SURPRISE!! Winnie the Pooh!!
Constructing the PVC body
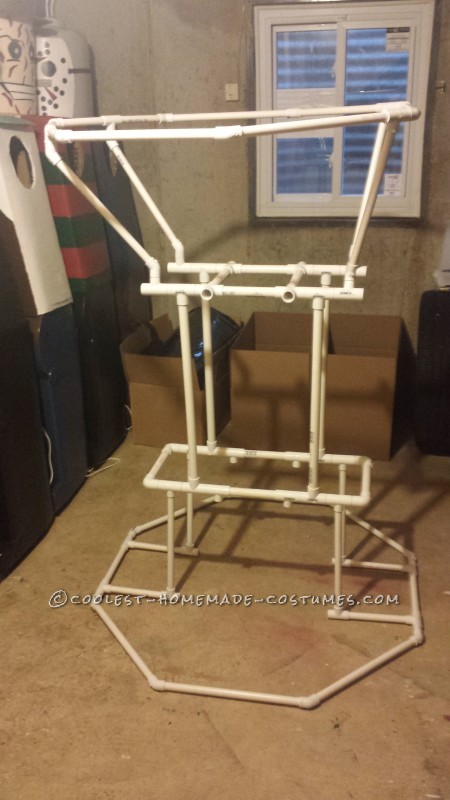
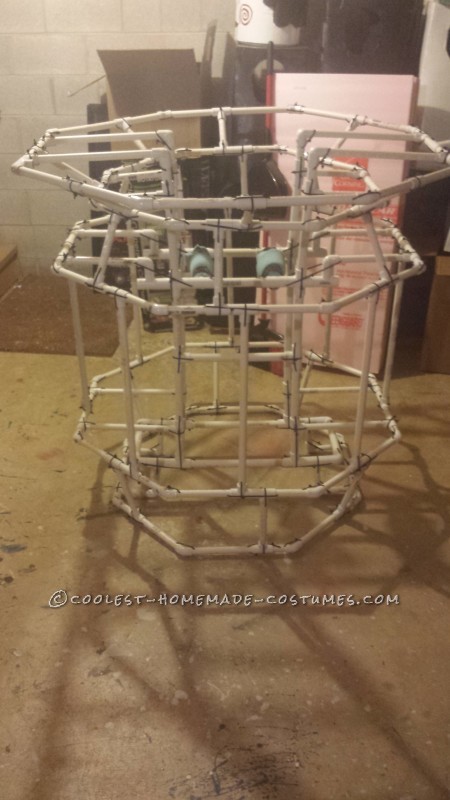
The only way I could think to make a Kool-Aid Man to scale was to start with a PVC skeleton. It needed to be large enough to fit me inside and give me enough room to walk and operate the Kool-Aid Man!
The main part of the costume rests on my shoulders, so I needed to make sure the inside middle part was just bigger than the width of my body. This would allow me to slip in and out of Kool-Aid Man with ease.
For the middle part, I used 1” PVC pipe and designed a rectangular cage that would go around my body. Three layers of 1” foam were added for the areas that rested on my shoulders.
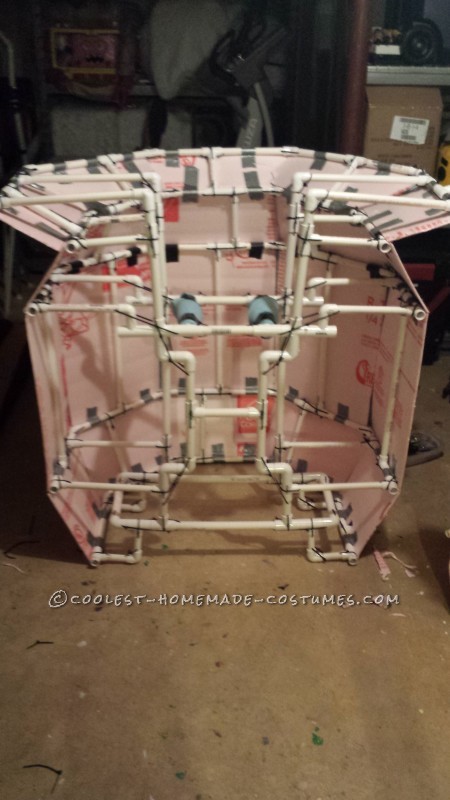
Once the inside cage was built, it was time to work on the general pitcher shape of Kool-Aid Man! This was by far the most complicated part of the costume and the most time consuming. There is no circular PVC pipe out there that I know of, so I had to work with 90 degrees PVC connector parts to form general circles. Multiple mistakes were made trying to make this work.
I ended up making five circles out of 3/4″ PVC pipe to form the pitcher shape. One large circle, two medium circles, and two small circles. The large circle was used to shape the very top of the pitcher. The two medium circles were used to form the middle part of the pitcher. The two small circles were used to make the bottom of the pitcher and top where the mouth of the pitcher meets.
Instead of using PVC glue I used zip ties to secure all of the connections. That way if I made a mistake, I could fix it.
Early design…..
Finally got the right shape down
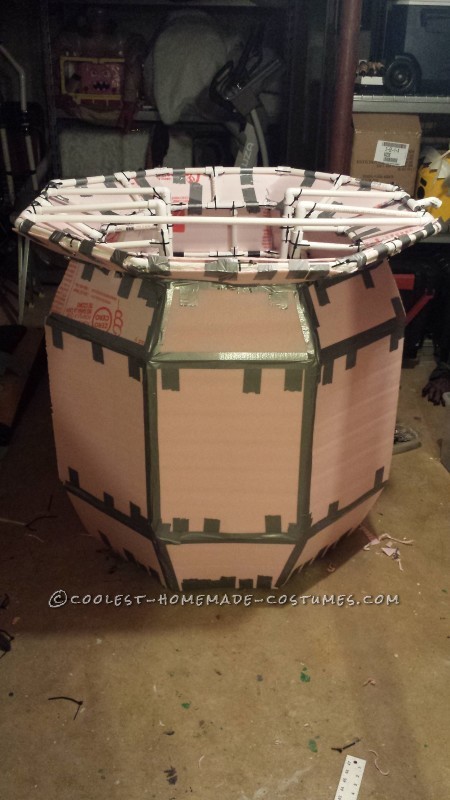
Constructing the outside of the Kool-Aid Man
To keep the costume as light as possible, I used 1/8” insulation foam. The foam was very durable and light weight. It created a nice base for the adding the next step.
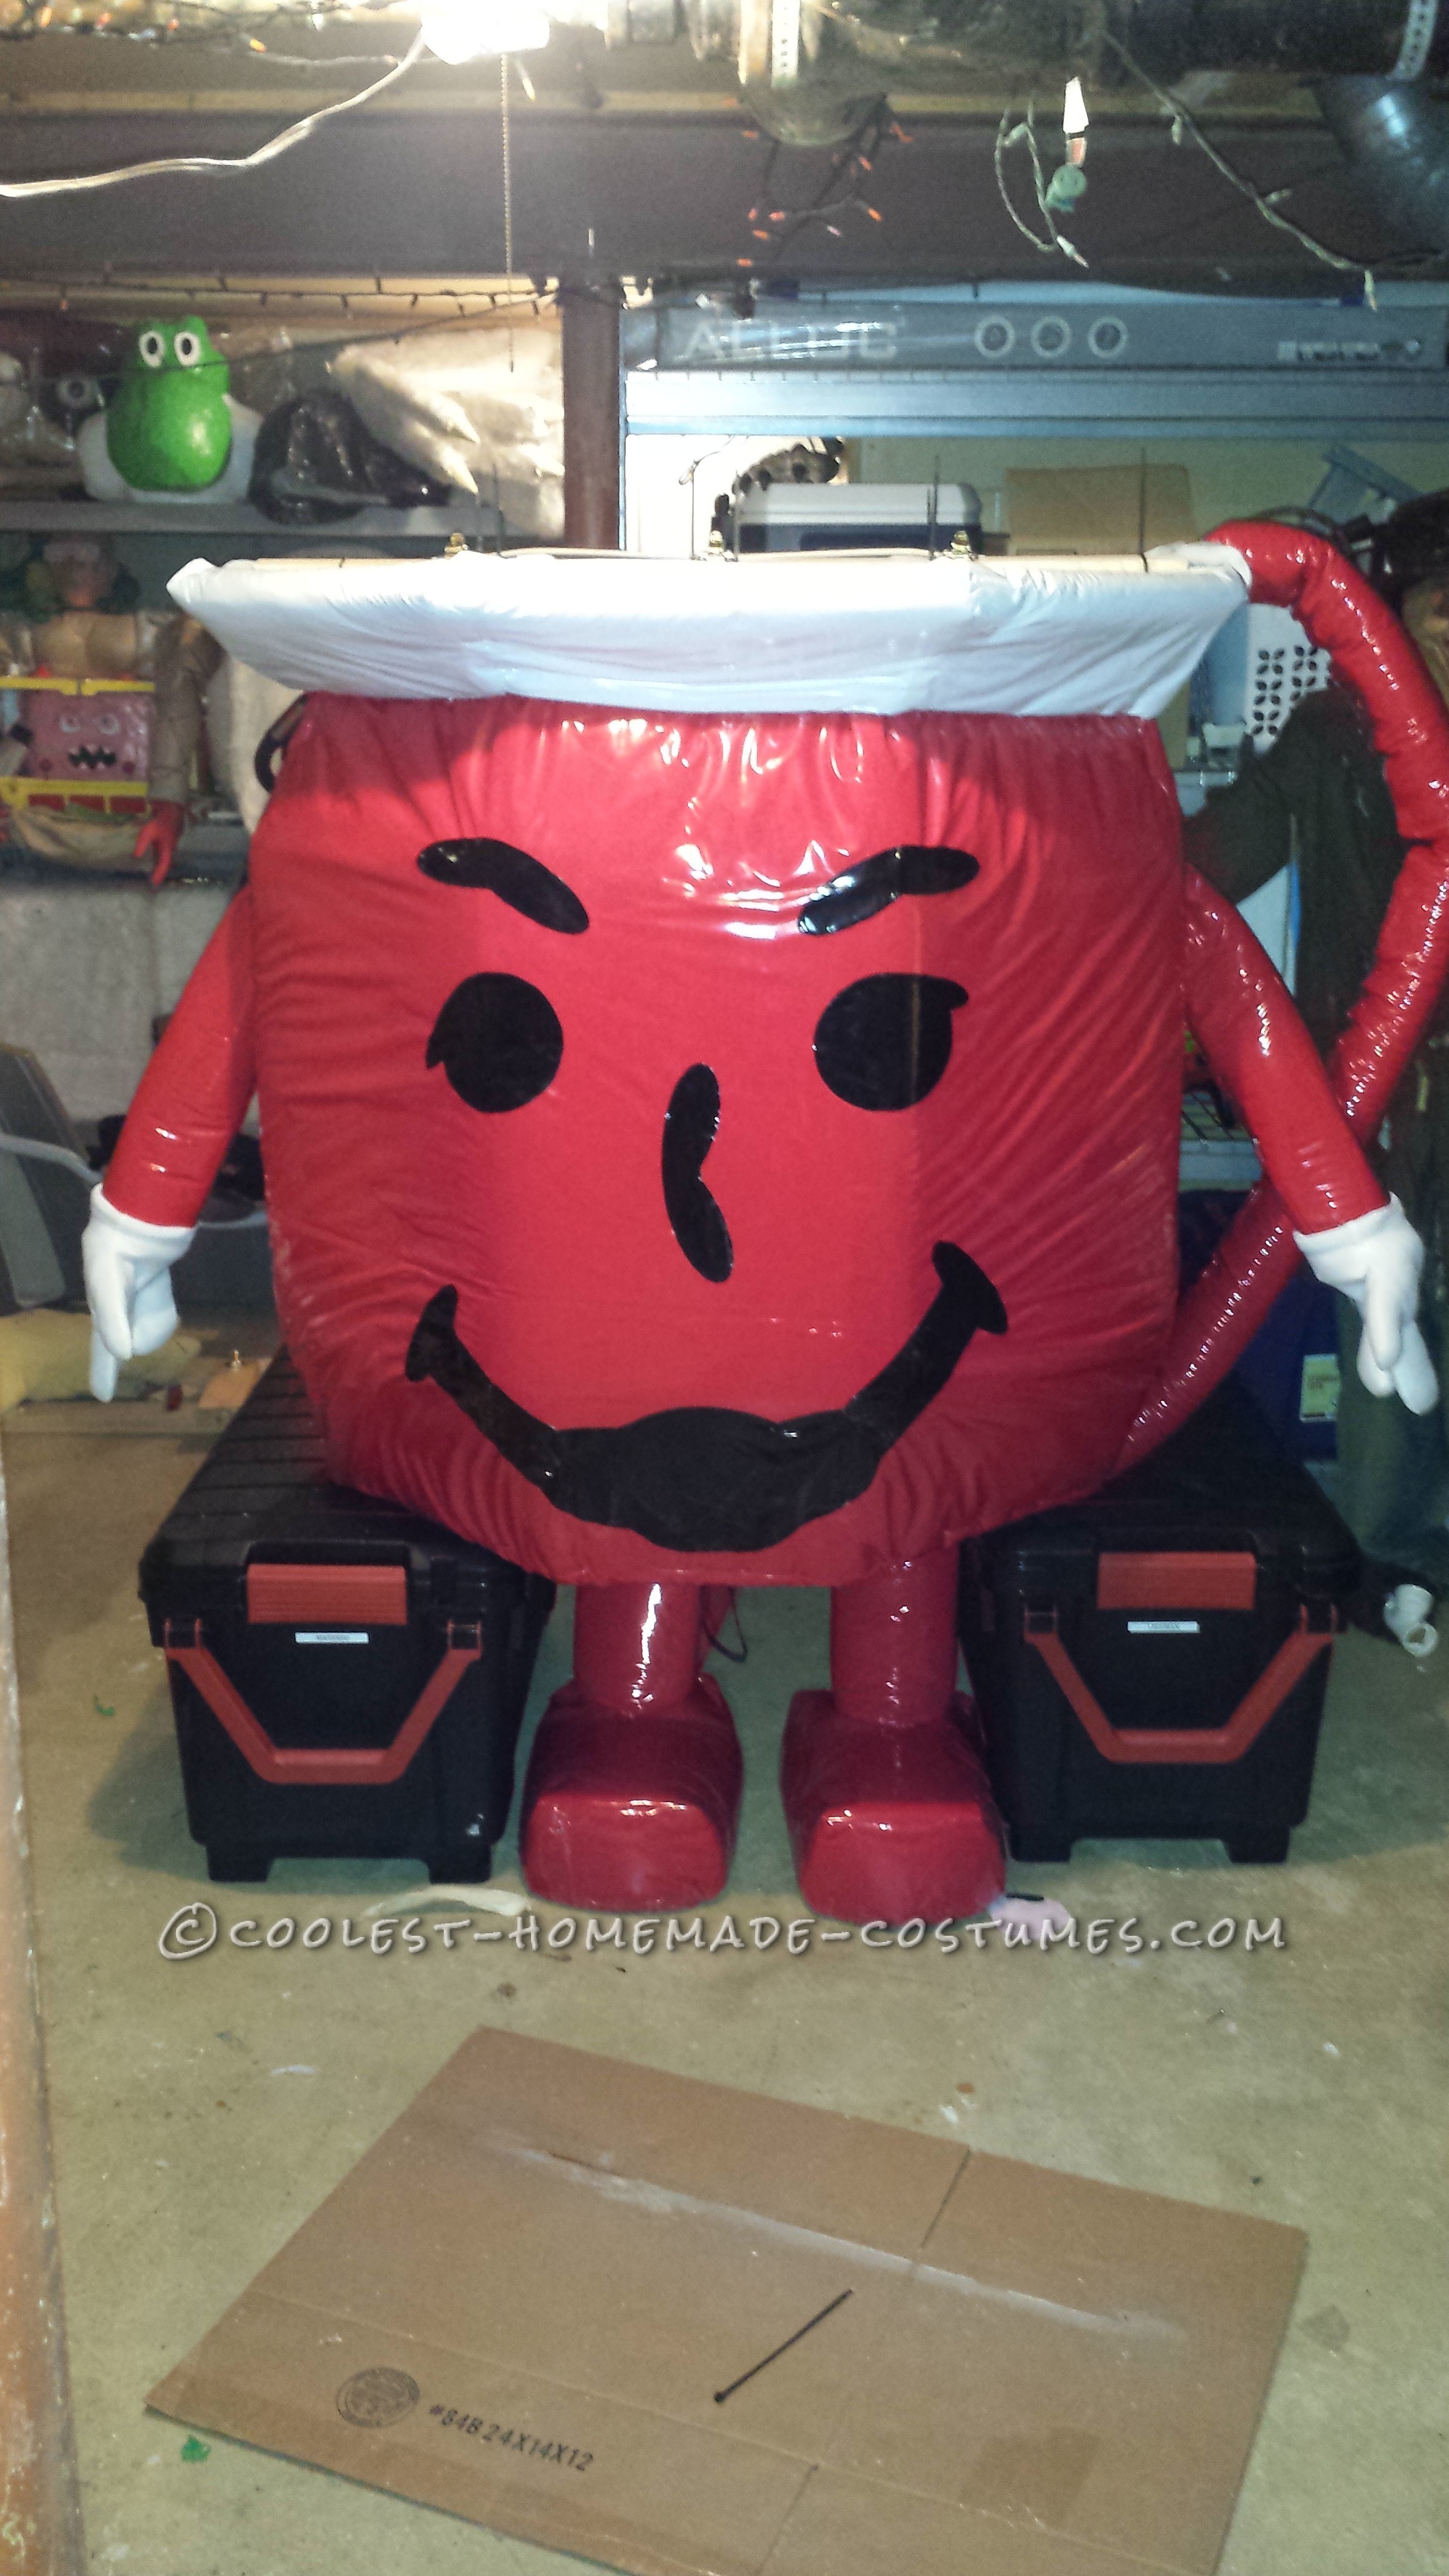
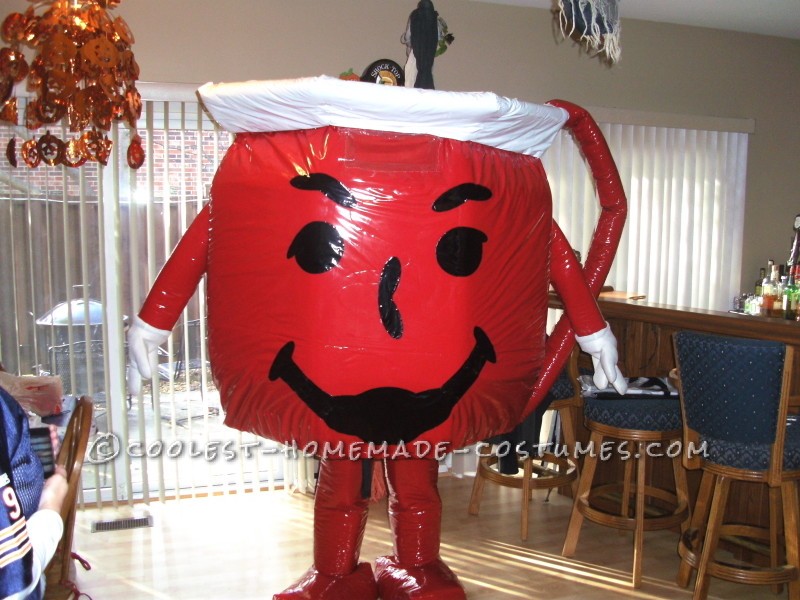
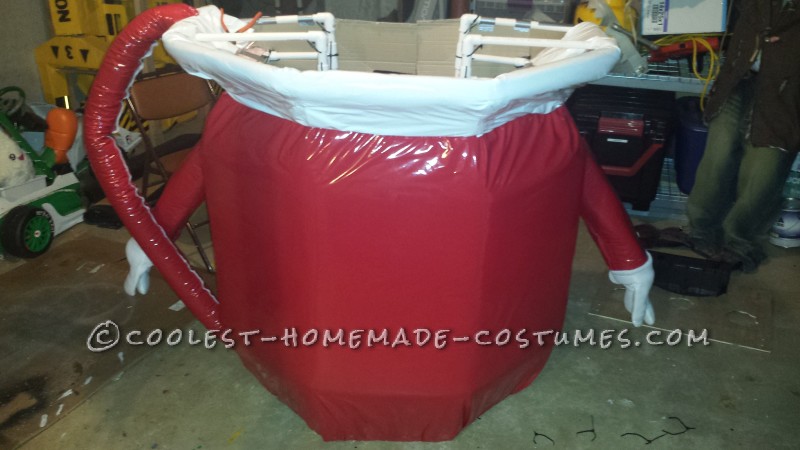
Once the insulation foam was hot glued down and the seams duct taped, it was time to give Kool-Aid Man his patient red Kool-Aid color.
I wanted to give the costume a wet look since in the end I am supposed to be a giant pitcher of Kool-Aid. I was able to find some shiny red pleather at the fabric store which gave the exact look I needed. To hide some of the edges of Kool-Aid, I decided to add some foam batting around the foam insulation. This helped to make Kool-Aid more round.
I started by hot gluing the batting to the shiny red pleather fabric. To secure the edges, I sewed the batting and shiny red pleather together. I used 20lb fishing line as my thread so that there would be no issue with the line breaking.
I used a similar process to attach the batting and pleather to the insulation foam. I hot glued the main area and sewed the outer edges.
To give the effect that the pitcher was a little empty, I sewed and glued on white pleather towards the top.
For the handle of Kool-Aid Man, I used a pool noodle and hot glued shiny red pleather to the foam.
The top of Kool-Aid Man was covered with a sheer white cloth that helped to hide the inside.
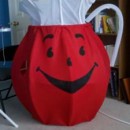
I traced out the face of Kool-Aid Man out of black pleather and hot glued it down on the red pleather.
Foam Insulation Added
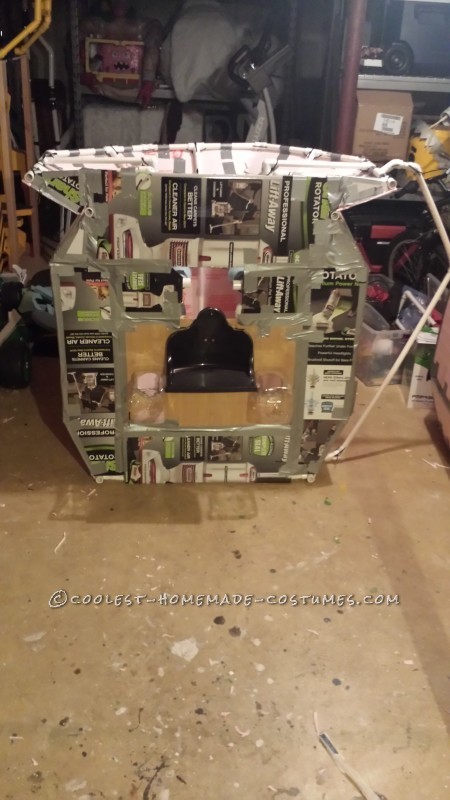
PVC Overload!
Red and White Pleather Added
Constructing the Legs and Arms
For the base of the legs, I used a cut up 12″ cement tube for the general shape. I covered both feet with 1″ foam. To make the the legs stand up straight on their own, I attached cement tubing to the feet with zip ties, almost like a shin guard.
The feet and legs were then wrapped in batting and pleather. I made sure the feet were very tight on my legs, so when I pulled them on, they would stay in place. I left the bottoms of the feet open, so I could wear gym shoes, and be able to walk around easily.
Due to the size of Kool-Aid Man, my real arms would not be able to stretch and fit inside his arms. I decided on a length for the arms and made them out of 1″ foam and then covered them in batting and red pleather. For the hands, I sewed on four finger large clown hands.
Even though my hands could not be inside, I wanted to still be able to use his hands. To accomplish this, I inserted sticks in each hand, which allowed me to move the arms and hands up and down as I walked.
The arms were sewn to the main body using 20lb fishing line.
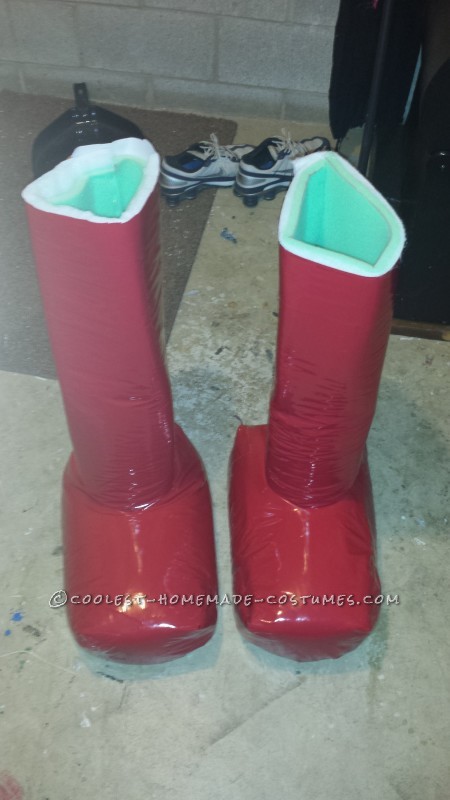
Kool-Aid Man Feet and Legs
Constructing the BIG SURPRISE!!!
You would think a HUGE to scale Kool-Aid Man was a good enough costume, but I wanted to go the extra mile and add a big surprise.
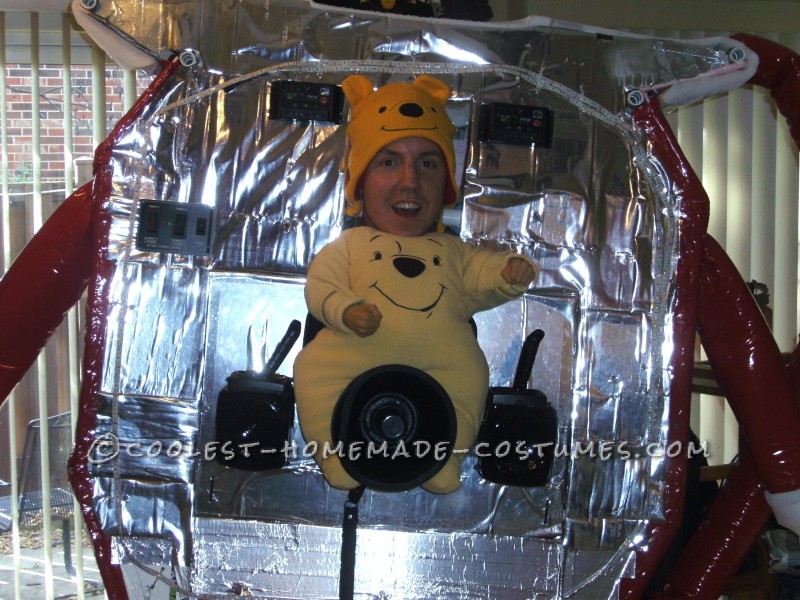
I had so much room on the inside that I thought of a great idea; remembering the movie Men In Black, I could design the inside of Kool-Aid Man to reveal a little guy controlling him from the inside!
To start, I disconnected the front face of Kool-Aid Man from the rest of the body. To hide my main body inside, I covered the inside with box pieces from a recent vacuum purchase. The box pieces were glued and zip tied down to the PVC pipe. I cut out a hole for my head to pop through.
Next, I added a seat for the little guy and joy sticks. The joy sticks were old computer joy sticks and the boxes they sit on are pretzel bins spray painted black. The very center of the inside needed to be 1/8″ flooring wood, so I would have something strong enough to attach the seat and controls to.
For the little guy inside, I went to Good Will to get a small child onesie. I happened to stumble on an AWESOME Winnie the Pooh used onesie! I then found a hat to match the onesie online. I stuffed the onesie with teddy bear stuffing. I found an old doll and used its arms and hands for the Winnie the Pooh guy inside. I screwed the hands to the joy sticks. Since the pretzel bins were hollow on the inside, it allowed me to slide my hands in there so it looked like the joysticks were really moving.
My next idea was to have Kool-AId Man speak. I wanted him to be able to yell “OH YEAH”. I found a megaphone online than ran off of an IPOD. I attached the megaphone to the seat right under the Winnie the Pooh guy.
Some of the phrases I programmed into the IPOD were:
“OH YEAH”
“OH NO”
“Cat call whistle and then the Beavis voice saying Hey Babe”
Once the megaphone was added, I covered all of the cardboard and wood in chrome paper to make it look more mechanical. I also added lights to the inside and miscellaneous electronic parts to complete the look.
The first plan was to attach hinges and springs so that the face would flip open revealing the little guy inside. This proved to be almost impossible or at the very least beyond my skill set. Instead, I attached the front face with zip ties. When the time came to reveal the surprise, I would cut the zip ties, and with one large jump, the front face would snap off to reveal Winnie the Pooh controlling Kool-Aid Man!
As an added bonus, I knew the costume was going to get hot, so I added two fans on the inside to keep me cool as I walked around.
The opening in the cardboard allowed for my head to look like it was attached to the body.
Hidden Compartment!
Wearing the Costume
When it finally came time to reveal the costume, everything worked out great!
I did have to know my surroundings in advance! Kool-Aid Man was too big to fit through a standard door, so I had to make sure anywhere I went had double doors. If they did not have double doors, I would have just came in by breaking though a wall I guess, LOL!
Once inside, I was hard to miss! Right when I walked in the door, I turned the megaphone way up and had Kool-Aid Man yell “OH YEAH”! The whole place starting yelling Kool-Aid OH YEAH! I did not know chest bumping was a big thing with Kool-Aid Man, but everyone seemed to think that was the appropriate greeting.
I entered the costume contest and got down to the finals against a well done Olaf costume from Disney’s Frozen.
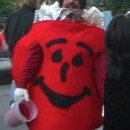
It was neck and neck until Kool-Aid yelled “OH NO” and leaped into the air! Once he hit the ground, the front popped off to reveal with lights flashing the little Winnie the Pooh controlling Kool-Aid Man. The audience was speechless for a couple of seconds and then went crazy cheering.
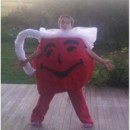
Kool-Aid Man Won 1st Place!
Overall
The final specs:
- Costume Cost – $300
- Time building the costume – Under 50 hours
- Over 14 yards of pleather (I got some interesting looks from the cashiers buying this much red pleather)
- Over 14 yards of Batting
- 3 Yards of 1″ foam
- 1 Pool Noodle
- Over 100 glue sticks
- Off the top of my head, I don’t know how many PVC pipes and connectors were used, but it seemed endless!
I hope you enjoyed the costume! I always enjoy making them and getting to display them on the Coolest Homemade Costume website!


Your comment has been sent successfully.