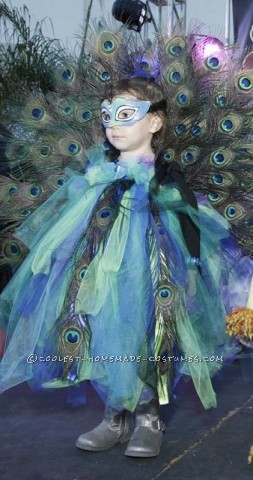
For weeks my three year old (going on 15) daughter, Adalyn, told me she wasn’t going to be anything else but Princess Elsa for Halloween, that was until we spent a morning at the zoo.
I took her and Emmett, her 1½yr old little brother, to the zoo, an outing we do at least once or twice every month. However, this time while having lunch with the elephants, a beautiful peacock (something she had never seen before) decided to join us. The amazing bird came around the corner with its tail standing tall, and after a second Adalyn turned away from the peacock to me and said, “Mommy look at how beautiful that birdie’s feathers are – I wish I had beautiful feathers like that too!” Immediately, I jumped on the opportunity because as much as I love princesses and always wanted to be one, I was hoping we could get away from the Frozen craziness for just at least a day. I looked at her and told her that she could if she wanted to dress up like a peacock for Halloween. Wow – was she excited after hearing that she could be a peacock; she could have a tail like the birdie.
The rest of our visit was spent trying to figure out which animal Emmett was going to be, and ultimately it was decided by Adalyn that he would be a lion, since it was the only animal sound he could make. The trip was concluded with her suggesting that Daddy and Mommy be zookeepers because they take care of animals, and since we take care of them and they were going to pretend to be animals, naturally we would just like zookeepers. Her thought process amazes me more and more each day. So with a smile on my face and a small battle won, we had instant family costumes! Now began the real challenge of making a costume that looked as close to what she believed to be a beautiful peacock. Since anyone who has a little girl, or knows a little girl, will tell you that if it’s not up to their standards, then no matter how hard you may have worked on it – if it’s “NO I’m not wearing that” – then it’s pretty much a NO, end of story – period.
I’ve attempted to make one thing in my life, and it was a sewing project were sadly I quickly determined that I can’t even sew a straight line, and my dreams of Project Runway would never come true. I am not and will never be a seamstress. Sad but very true! So, I will say that after Adalyn agreed I was a little apprehensive about taking the project on. I can honestly admit that I have always bought my costumes. I’m not a real crafter (or so I thought) until I decided that I was going to commit myself and it was going to turn out great even if I had to do it until I got it right. Where in the world would I find the time – I still don’t know!
I began my crafting journey by doing what any normal person would do – looked for inspiration on Pinterest. There I found a huge selection but nothing that I thought would work for my small active three year old. Most posts suggested using a fan as the backbone of the tail, but I didn’t want the bulky end of it against her back. I could hear her reaction even before she got it on – “But Mommy, it’s not comfy!” So after looking a little more, I decided I was just going to take what I’d seen and what I had worked out in my head and go for it! Here’s what I did –
Sorry, I didn’t take pictures as I went along because I didn’t know if it was even going to turn out. No sewing was done either. ;)
Materials Needed and Steps – Hot glue gun and LOTS of hot glue sticks – at least 1-2 bags
1. Outfit –
- Black shirt and legging pants
- Blue colored jewels
- Silver boots
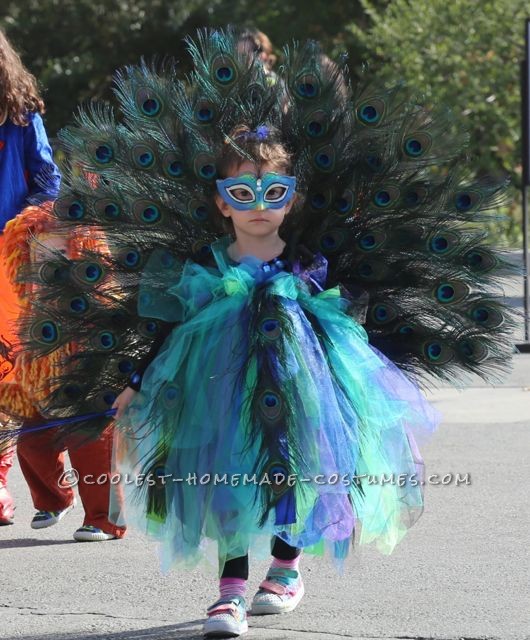
For the outfit – I went back and forth on if it should be blue since a real peacock’s body is blue or black. I didn’t want to spend any money, so I went with what she already had in her closet or used to be in her closet. I dug out a size 18 months black shirt and leggings because I wanted it to be kind of snug to her body. Since it wasn’t blue – I thought by adding some blue jewels, it would represent the body. I arranged them along the collar and down the chest and then hot glued them to the fabric. Three more jewels were added to the ends of each sleeve and it was done.
2. Tutu dress –
- Tulle – varied colors – I used black, royal blue, lime green, teal or turquoise, purple, light blue.
- Ribbon – varied colors – I used royal blue and lime green.
- Peacock eyes – I used 11 on the dress.
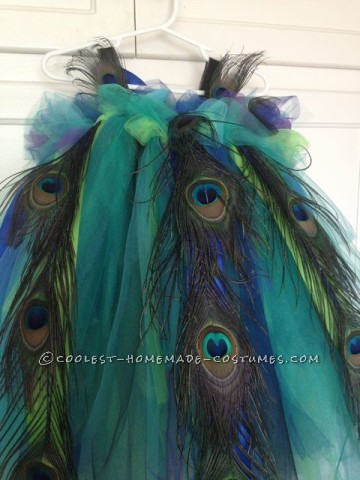
Making a tulle dress is super easy (watch YouTube for ideas) especially when you buy the rolls of tulle they sell at Michael’s. After again debating if it should be a skirt or dress – I cut at least 35-40 24 inch long pieces of each color of tulle because at the time, I wanted it to be long and full. I only used a few pieces of black and purple since those colors aren’t really dominant on a real peacock. Next, a measurement of my daughter’s chest was taken with the piece of blue ribbon I would use to tie all of the tulle onto to make the dress. Next, take the tulle in any arrangement of colors and begin tying them around the ribbon in a pattern. To tie them on – I took them and folded each piece at varied lengths, then used a slip not like tie around the ribbon pulling each as tight as possible so they would all stay in place.
After it was completed, five pieces of ribbon were tied into the dress at equal distances around the entire dress – three green and two royal blue. The three across the front of the dress were used to hot glue peacock eyes. The peacock eyes were used on each pieces of ribbon. Lastly, black tulle was used to make shoulder straps to help keep the dress from falling down. The dress was tied around Adalyn, and I just took a shorter piece of tulle, folded it in half, and then again tied it onto each side of the dress over her shoulders. Lastly, I added two small-eyed peacock feathers to cover where the front shoulder ties were located. So all she had to do was slip her arms into the appropriate holes and the ribbon was tied around her back. The dress wraps around her entire body, but with movement, ends up looking like the back is open slightly for the tail.
** I wish I wouldn’t have made the dress as full as I did because the first few times she put it on the tulle ended up in a huge ball in front of her stomach from her playing with it, which is also why I made a wand for her to keep her hands busy.**
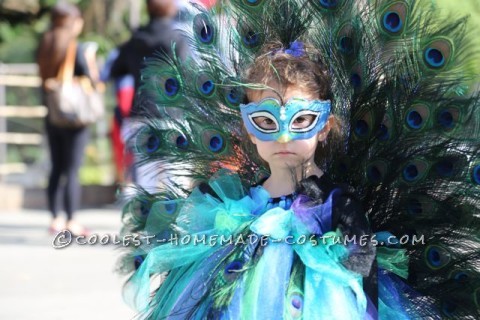
3. Tail –
- Cheap mesh Butterfly wings – My daughter had a pair we had found at Target for $1 at Easter time.
- Cardboard.
- Felt – I used lime green but I don’t think the color would matter.
- Sequins material – I used just enough to cover one side of each of a large and small wing.
- Long stem Peacock feathers – I used about 50-70 but significantly cut them down to the get the lengths that I wanted.
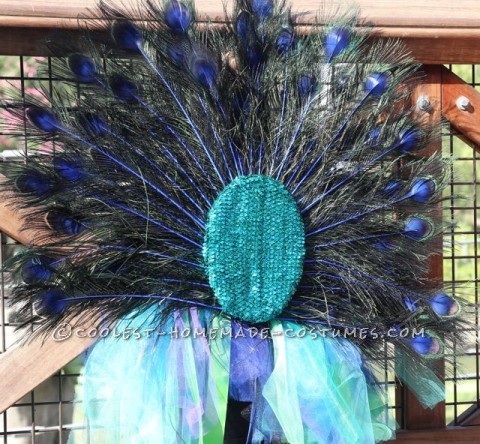
Take each of the butterfly wings and pull them apart so there are two larger pieces and two smaller pieces. Try to be careful and keep as much of the mesh in tack as possible. Next, take the large section and cut out a piece of cardboard that is just slightly smaller then the wire. Hot glue one wing on either side of the cardboard so the entire piece is more solid. Set aside. Repeat the same process with the small section of the deconstructed wing. Then, take the larger wing and cut out pieces of felt that is a little larger the form. Hot glue the felt to each side to cover it completely. I folded one side over the other and had a little extra material on the one side, but that doesn’t matter because it all will be covered by the sequins material in the end. Repeat with the small. Now, again with the larger form, take four pieces of tulle and poke them through the entire form and knot so they stay in place – shoulders with apart, two on the top and two closer to the bottom on each side – it was easiest to hold it up and make marks based on where her shoulders were and her middle back since that is where I wanted it to hang. Ultimately, the two pieces on each side will be tied together over the shoulders.
Next, pull a piece of the sequins material tightly over the form on the side that has the extra material from the felt and the knot from the tulle. **This part is much easier with two people – my mom was visiting me and she helped with putting the tail together – especially this part. It gave us a lot of trouble for some reason, so a few swear words slipped out if I remember right. Anyway, wrap the material around the sides and hot glue the entire piece in place. The back part is done, so leave the side that has the pieces of tulle coming out of it alone – this is where the feathers will be glued to next. Put it down for now and separate out the feathers to find the largest eyes, medium and smallest. Next, take the feathers from largest to medium and small and start gluing them down on the large form. Making sure to be very careful to work around the tulle for the shoulders so they don’t accidentally get glued down too. Continue adding feathers in rows and gluing them down until you have a full tail.
After all the feathers are on, you shouldn’t be able to see the felt of glued sequins material that was around the top. The tail is almost done! Now, take the smaller form again and repeat the process for adding the sequins material to just one side (this will be the front of the tail which was tied to her back.) Finally, poke just the bottom two pieces of tulle through the form at the bottom and pull it through until it is lying on top of the feathers. Hot glue the top sequins piece to the feathers – so it looks like the feathers are sandwiched between the larger sequins pieces which is on the back for everyone to see and the top sequins piece which rests against her back. Viola – it’s done and now the tail is tied onto her back and rests flat against it!
**After Adalyn tried it on for the first time – I told her she had to be gentle and what how she walked through doors so she didn’t break the feathers. So she started walking sideways to get through them. She was sooo excited – So cute!**
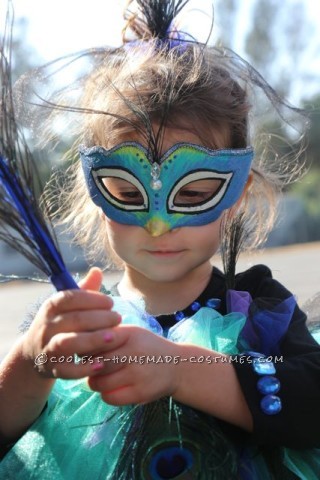
4. Mask –
- White masquerade mask
- Paint and paint brush – similar to the colors of tulle
- Glitter glue
- Jewel and Pearl
- Peacock feathers – just a few of the left over filler like feathers found along the bottom of the stem
- Tulle – black
This gave me more trouble then any other part of this project and took me the longest too. I couldn’t get it to look right – and this to me was just as important as the tail. I removed the elastic that was supposed to keep it on and instead used the black tulle to tie the mask. I am not an artist either apparently. I ended up repainting it a couple times but in the end I thought it turned out okay. I tried to make it look like there were feathers on it too with layers of color and glitter.
**After Adalyn wore it the first time, she told it was scratchy on her face. So, I hot glued felt to line the inside which touched her face. No problem after that – woo hoo!
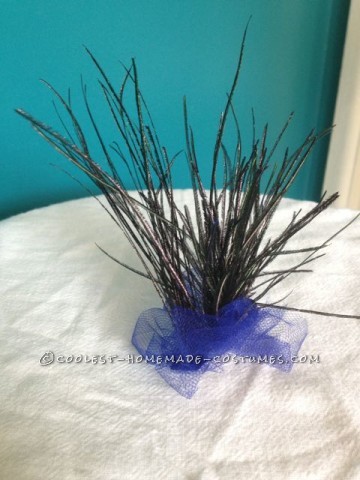
5. Hairpiece
- Blue ribbon covered hair clip
- Tulle – royal blue
- Peacock feathers – a good amount of the left over filler like feathers found along the bottom of the stem
Hot glue a bunch of the small peacock filler feathers onto the clip and the hot glue blue tulle around the base to hid the ends of the feathers.
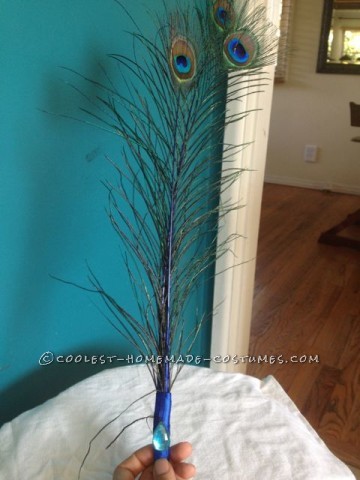
6. Wand
- Peacock feathers – 3 small eyed
- Ribbon – royal blue
- Jewel
This was a last minute addition so that Adalyn wouldn’t play with her dress so much – it kept scrunching up into a ball in front of her. I hot glued three feathers together and then wrapped the base with a blue ribbon and glued it into place. To hide the seam, I glued a large jewel onto it too.
Adalyn loves this costume, and so did everyone else. Everywhere we went, every man, woman, and talking child commented on it. I’m not kidding, every single person! People were coming up to us telling that they were on the other side of the theater or zoo and were told to come and see the amazing peacock. She got so much attention that at first she was uncomfortable, but then ate it all up! We took her and her brother to the symphony and she asked if she could get up on stage, so we entered them into the contest and she took first place. I was so proud of myself for accomplishing my project, but even more proud that she told everyone that she was a peacock!


Related costumes:
 Top 10 Stunning Homemade Peacock Costumes to Inspire Your DIY Costumes
 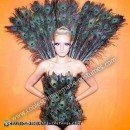 Linda’s Awesome Homemade Halloween Peacock Costume
 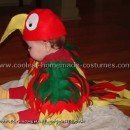 12 Coolest Homemade Parrot Costume Ideas
 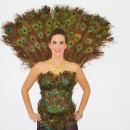 Amazing Peacock Costume – Entirely Homemade!
 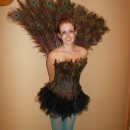 Sexy Homemade Peacock Halloween Costume
 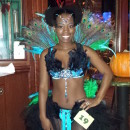 Dazzling Pretty Peacock Halloween Costume
 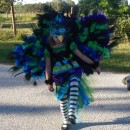 Awesome Homemade Peacock Costume
  Majestic Peacock Costume
Your comment has been sent successfully.