One fine day at the end of September, my 10 year old daughter Lauren finally decided what she’d like to dress up as this Halloween – “Mom, I’d love to be one of the ‘Weeping Angels’ from Doctor Who – please, please, please – can I be that?” “Well”, I said (as I scanned my brain for how to make it work from bits and pieces of dressing-up clothes already upstairs) “We could use the white feather angel wings, a white dress, white face-paint and I’ll put your hair in a bun and spray it white with that hair color that comes in a can?”
Well, the look of disappointment that swept over her little face was heartbreaking. “But, Mom – the weeping angels are grey, they look like they’re made of stone – I’ll just look like an ordinary angel – not one little bit scary, at all…” (Cue, heartbroken child leaving the room!) “Okay Lauren, let me think about it and we’ll figure something out, I mean it shouldn’t take that long to make, surely!” So started the four week journey into creating a costume through trial, error and complete and utter guesswork (personal needle/pin stabbings, hot glue burns and a bad case of aching back not withstanding!) that culminated in one very happy little girl this Halloween!
Mission Number 1: The Wig
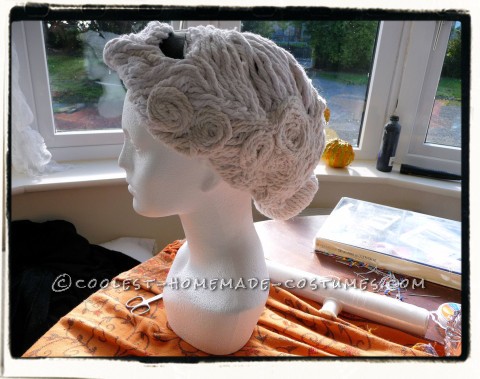
Well, how to make hair that looks like stone? Good question, you need to create it from something. Oh, I have a couple of wigs upstairs; no, too flimsy – they’d loose all their definition if I plastered and painted them. Think, think, Wool – great idea – unfortunately, that is quite narrow – I need something much thicker. Inspiration comes when you least expect it – on mopping my kitchen floor in fact! – the yarn in my mop head is nice and thick and ‘eureka’, I’ve got it!
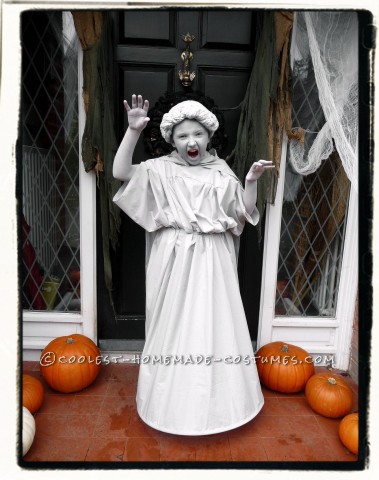
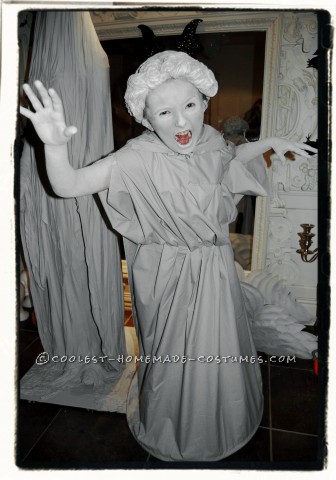
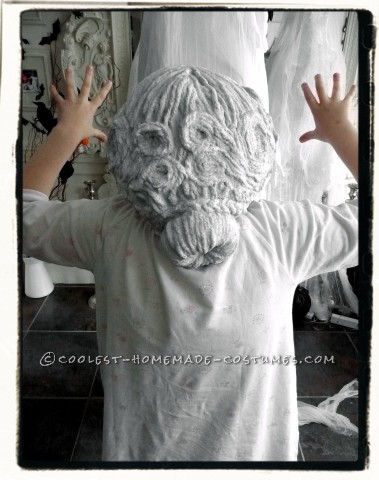
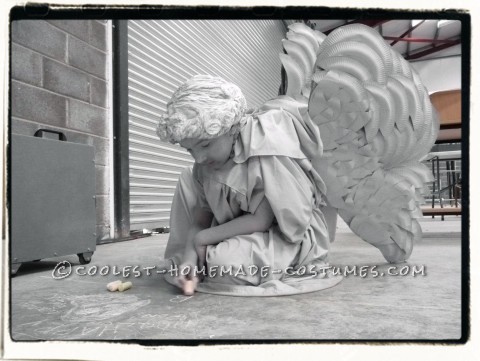
I buy a mop head and get my husband to dismantle it – I separate it carefully and sew a line through the middle – I try it on Laurens head (she’s very excited), but it’s too small so another trip to the store for another head (which happens to be creamer in color this time). I decide that I should construct the wig onto one of Laurens swimming caps and use my mannequin head as a template. So begins the fun of wig making. And actually it’s quite therapeutic really, apart from the numerous needle stabbings of my poor fingers, that is! Once I’m satisfied with the design and shape I’ve created, I set about plastering it, which is quite a messy job but sets quite nicely after two days. I then paint it and when it’s dry – Lauren tries it on for the first time; success – she’s really happy!
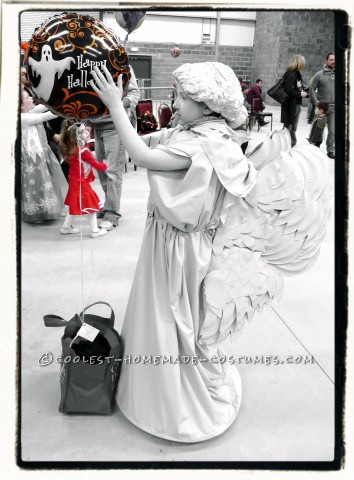
Second Challenge: The Wings
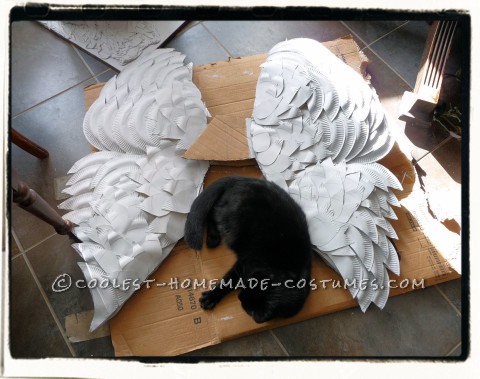
What can I use for wings – these are going to be large and there is no way that I can get my hands on that many feathers. I need something that will give an impression of wings with contours – I think of cutting individual ones from cardboard and almost start that process when I see some paper plates in my cupboard – they have lovely ridges and could work, I guess. I scout all the grocery stores in search of the perfect paper plate, who knew there was such a difference in quality, eh? I finally settle on one brand and buy 100 of them (two packs), not even sure that this will be enough, but hey, I need to start working on these wings today.
Cut a template from a cardboard box and set about hot gluing on the different shapes I’ve cut, there are paper plates everywhere! All going well, I’m quite pleased with myself really at this stage. I only get one bad burn (tip: never turn to answer a question when you have a fresh layer of hot glue on a paper plate in your hand, never – OUCH!). I paint the finished wings in the same color as the wig. Looking good. Need to attach them to one another and make some sort of a brace as these are quite heavy. Through trial and error, memory foam and two satchel straps – it’s finally done – Lauren tries them on and amazingly they are actually comfortable on her. Phew!
The Final Countdown: The Dress
I have this idea of making a dress from a bed sheet.
Tracking down the said bed sheet proves more difficult than I thought.
The only one I can find in the color I want is a double (not a king or queen) and fitted!
Fitted! Help!
(You should note at this stage that I have never used a sewing machine or made a garment of any kind in my entire life, my sewing skills have never progressed beyond some light mending and the occasional button replacement!)
I place the fabric over Lauren and start to cut and invent a shape that I think will work. Fingers crossed.
Anyway, somehow, I pull it off. Much more needle and pin stabbings of innocent unsuspecting fingers occur this time.
I make a cape out of the left over material to cover up the middle of the wings to make them look like they’re part of the dress.
I use every bit of that sheet, all I have left is a 2” by ½” strip – very thrifty indeed!
Finished! and it only took four weeks!
Ok, let’s put all the elements together for the first time.
Tonight is her School’s Halloween disco.
Here goes.
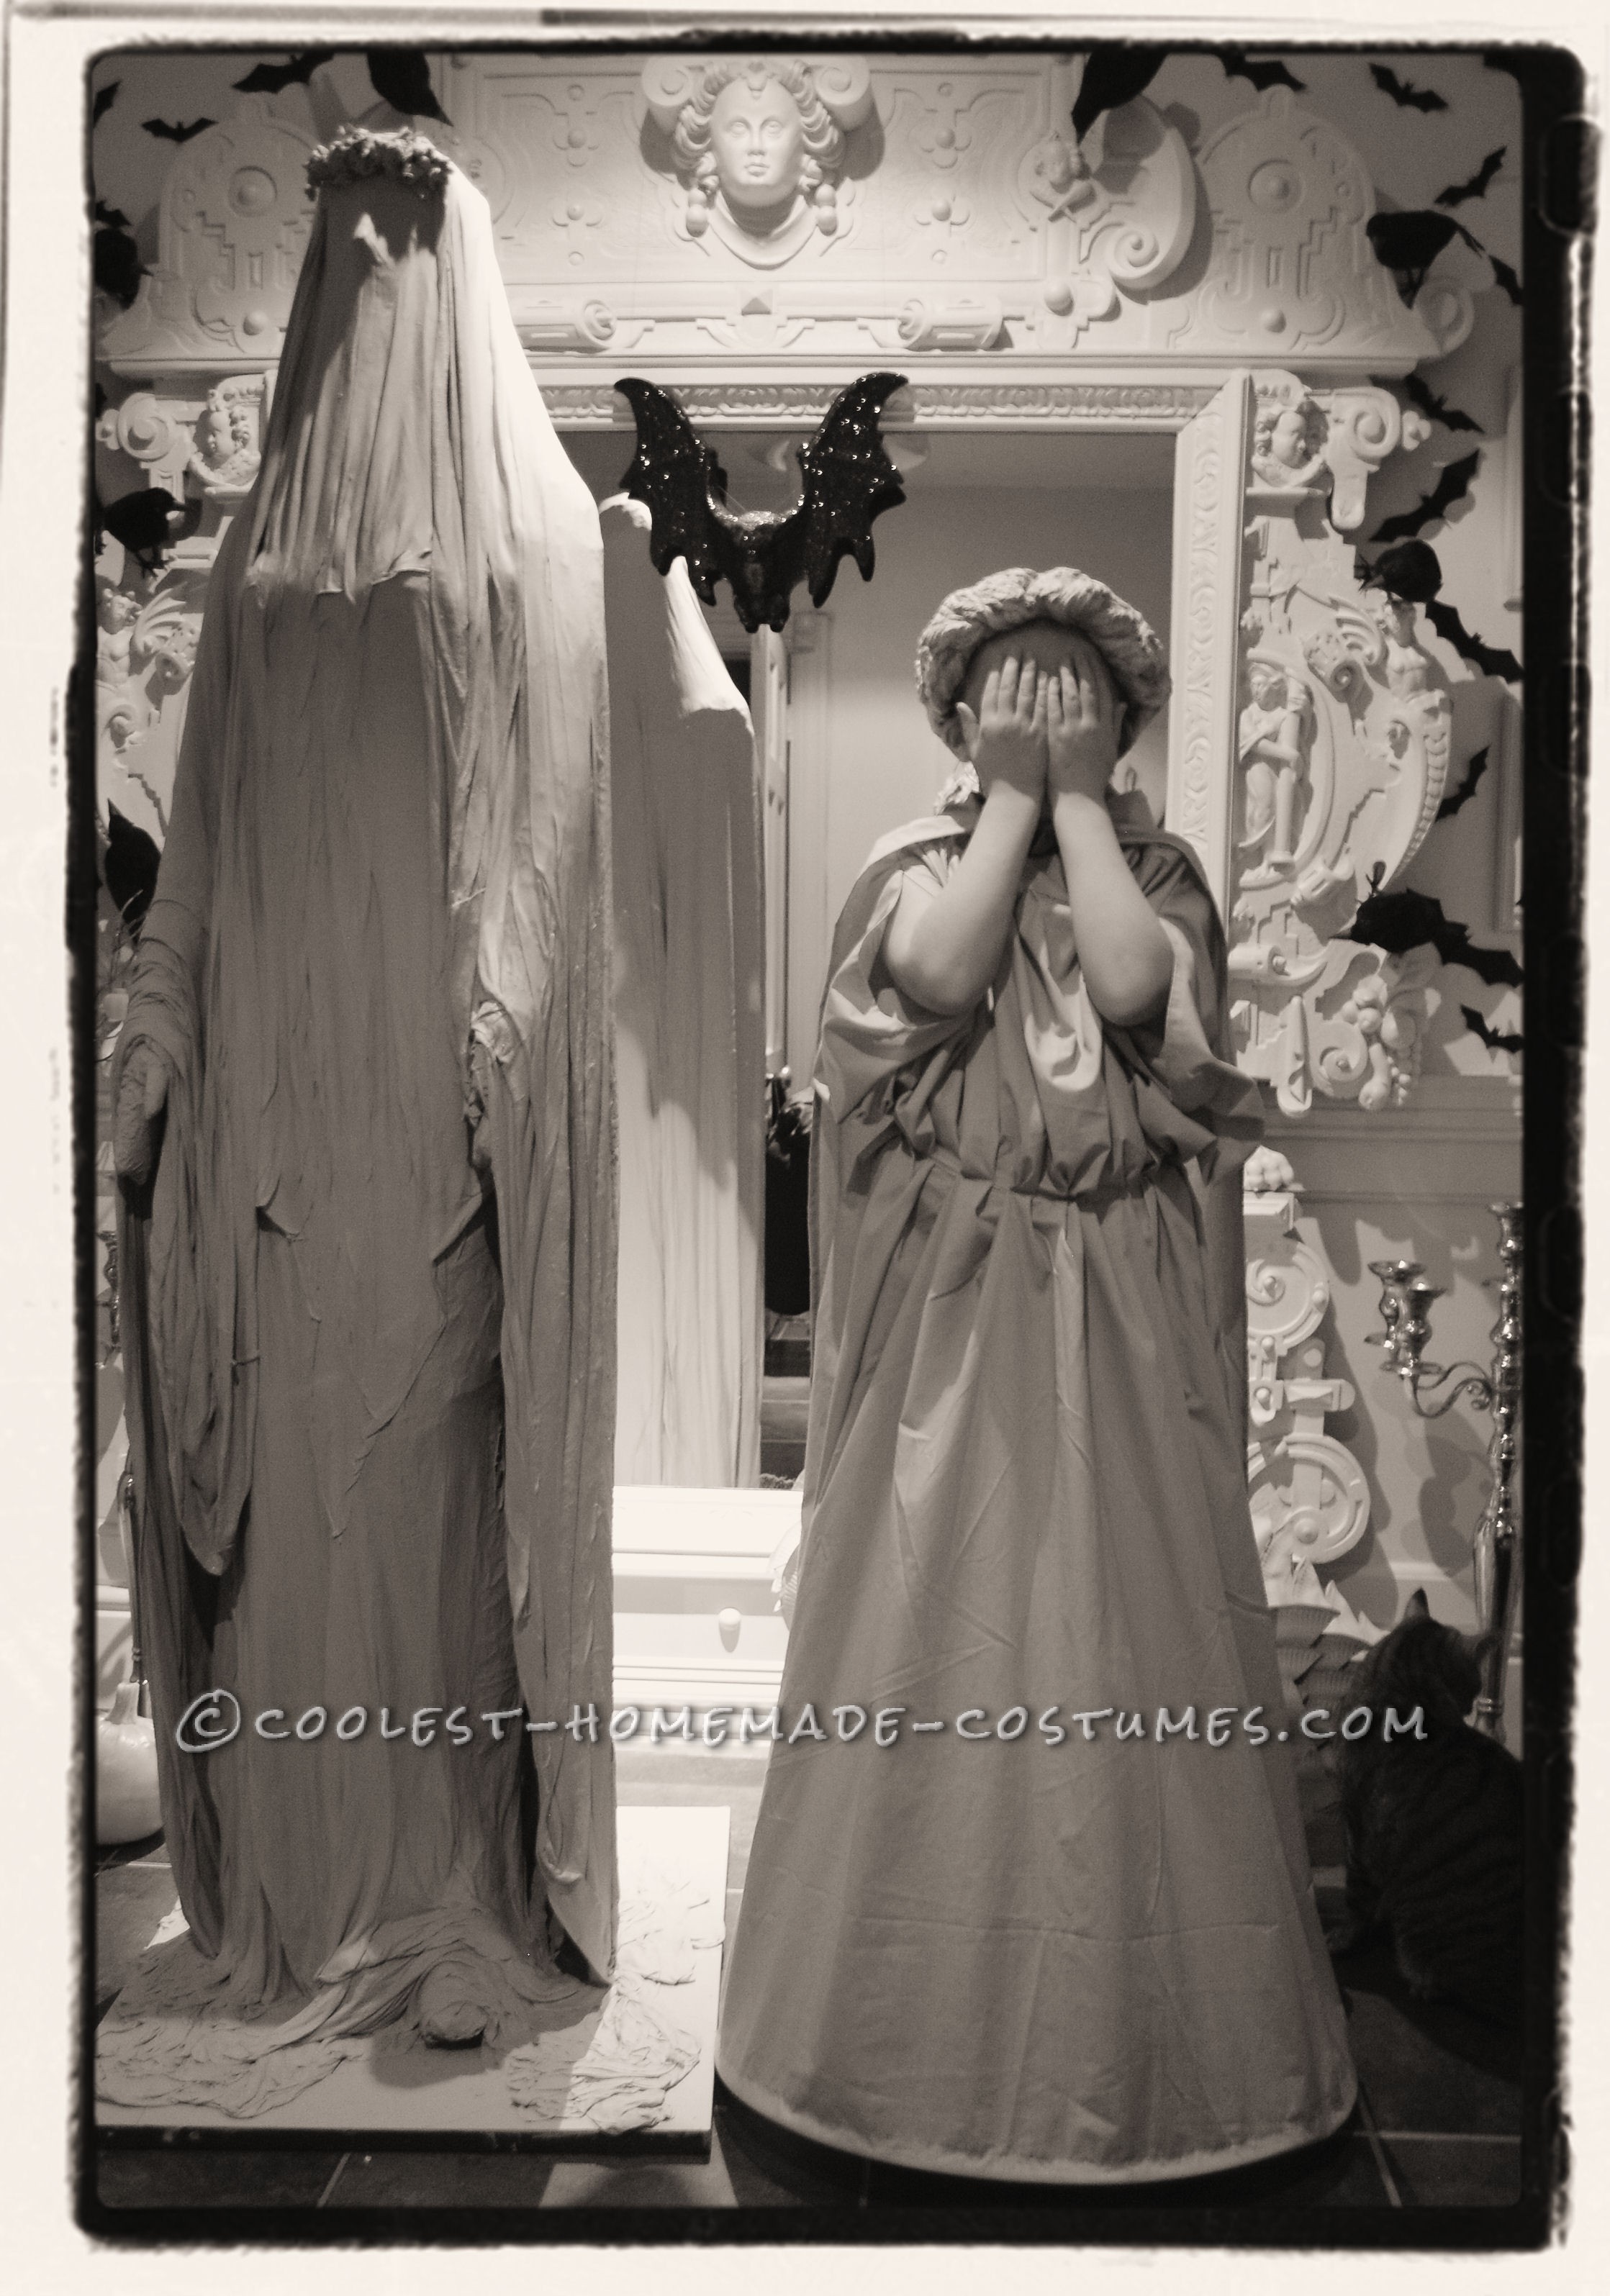
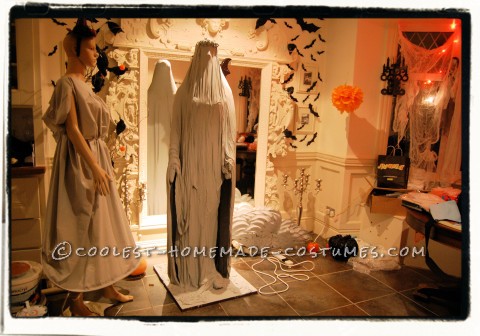
Face paint is applied to face, neck and arms; wig and dress follow. Lastly, wings are maneuvered into place and et voila, she sees herself in the mirror for the first time.
I’ll never forget the look of sheer joy on her face.
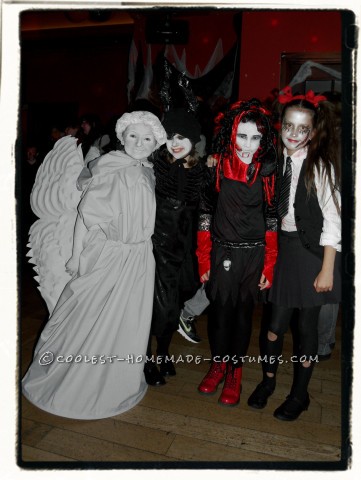
She thoroughly enjoys the disco and the compliments are flowing freely along with the look of amazement from the other kids.
She wears it again for the Pumpkin Festival the next day and people approach and ask if they can take photographs of her, which she happily poses for. She wins the fancy dress competition.
She is truly happy.
Now, what will she come up with next year!

Related costumes:
 55+ Coolest Homemade Fairy Costumes
 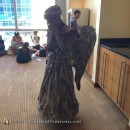 Coolest Scary Weeping Angel Costume
  Awesome Wun Wun the Giant, Game of Thrones Costume
  Authentic Frozen Family Costume – Elsa, Olaf, and Kristoff
 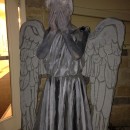 Weeping Angel Costume from Doctor Who
 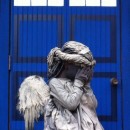 Littlest Weeping Angel Costume
 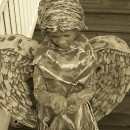 Amazing Cemetery Angel Costume
  Coolest Dr. Who Weeping Angel Costume
Your comment has been sent successfully.