For 30 years I have been making costumes for my family. Finally, I made one for myself.
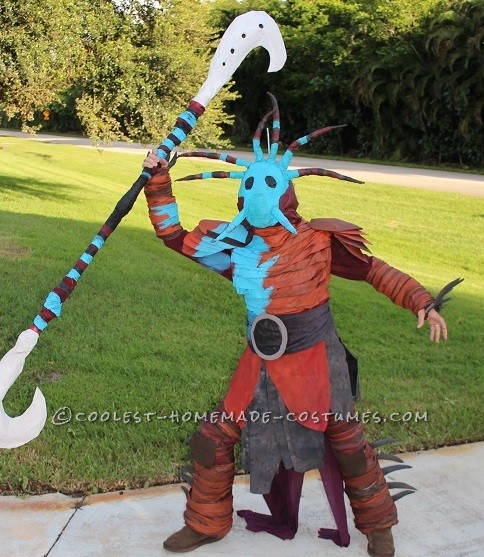
There are not many strong middle aged mom characters out there to imitate until now. Valka, Hiccup’s mom from How To Train Your Dragon is the coolest mom ever.
In an effort to keep cost down and try to reduce the vast amounts of supplies I already own, I decided to make this costume entirely from painted fabric and foam. It was a very inexpensive costume to make even if you had to buy the fabric.
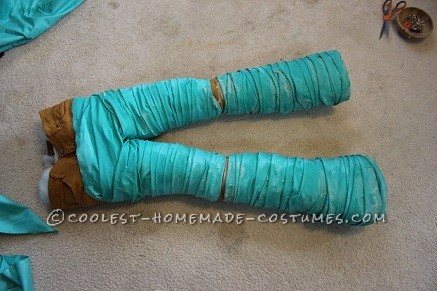
The base of the pants section of the costume is a pair of loose fitting pants that I already owned. I stuffed the pants tightly. Over the pants I wrapped the lower leg (below the knee) with quilt batting. Then I made strips of fabric that were about three inches wide and wrapped the legs of the pants in the fabric strips. I had several yards of a light weight cotton fabric that I used to make three inch wide strips from. There are about 15 yards of fabric strips in this costume overall.
The pants are wrapped all over except at the knee and the top of the waist. I wanted those areas free of excess bulk.
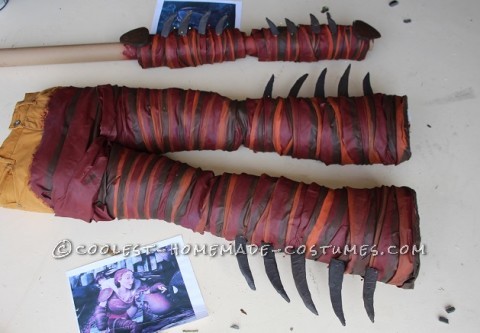
To keep the layers of fabric strips in place, I painted the entire surface area of the wraps with a 50/50 mix of white glue and water. After letting the glue dry thoroughly I painted on stripes of brown ,orange and burgundy craft paints. I loosely followed the lines of the fabric strips. The stripes are thinner than the wrap lines so there are more than one color on most of the fabric strips.
For the spikes that go on the sides of the calf section, I used a foam exercise mat. There are five spikes about three inches long on the sides of each calf area. The spikes are covered in masking tape to round the edges and then covered with a caulking material. They were then painted with brown craft paint. The spikes are very light and flexible.
The spikes are glued to the calf area using a silicon adhesive. I like GOOP. It is strong , waterproof and remains flexible.
The bodice of the costume is made of strips of fabric that were cut into three inch strips. There are about three different fabrics used on the body section. As long as the fabrics are similar the finally look will be good. Once the fabric is painted, the differences in the fabric are no longer noticeable. I have a body form in my size that I used to keep the right size and shape as I was forming this section.
Starting at the bottom I zigzagged back and forth working my way up to the neck area. There is a slit down from the neck at the back to allow the bodice to be stepped into. The arm holes are a couple of inches larger than a vest would normally have to allow for ease of movement.
While wrapping the body section I folded the wrap fabric in half as I went along. The folded section of the strips are faced down with the raw edges of the strips faced toward the neck. As the body was wrapped upward only the folded side of the strips show. To keep the fabric strips in place, I used pins. The body was then painted with a 50/50 mixture of white glue and water. When the glue was dry the entire bodice was base coated with a burgundy paint. Once dry a top coat of burnt orange was applied.
There are little armor accents on the top of the costume. These pieces were all made from craft foams. The circular pieces go on the shoulders and the little triangles go on the elbows. After I was done with all the painting , I glued these on to the costume.
The shoulder armor has five layers that I gently curved using duct tape on the underside taped together. The shoulder armor is made from a red craft foam that I painted with brown and orange paints.
The turquoise paint was applied after all the top parts were completed and glued in place.
For the arm gauntlets, I started with a pair of knee socks that I cut the feet off of. The socks were slipped over a cardboard tube and wrapped with quilt batting. The batting was then covered with strips of fabric and then painted with a 50/50 mixture of white glue and water. The glue was allowed to dry and then the gauntlets were painted in the same fashion as the legs of the costume.
I made similar spikes to the ones on the legs. These spikes were about 1.5 inches long. GOOP glue was used to apply these to the sides of the gauntlets.
There is a claw like hand that sticks out from the wrist. Foam from a 1/2 exercise mat was used. The foam hand was covered with masking tape, a layer of caulking , then a top coat of brown paint. The claw was glued to the wrist with GOOP glue. At the elbow area, a triangular piece of armor was glued on.
The costume has seven flaps of varying length that hang from the front of the costume. The flaps are made from a coarse grey fabric that I streaked with brown and grey paints. There is a dark brown belt. The belt is about 12 inches wide. I cinched it down by creating a couple of pleats. The belt is glued to the center back. The front flaps are slipped under the belt In the front of the bodice. The flaps are glued in place with GOOP glue.
There is a top loin clothe that was made from two crudely cut triangles of dark red fabric that were topped with streaks of orange paint. These loin clothes were glued under the belt on top of the grey flaps.
The large belt buckle is a foam circle painted with craft paint and glued to the front of the belt.
Grommets were added to the back opening and a shoe lace was used to tie the top closed at the neck. When all the pieces were completed, I assembled the costume and using a dry brush with a watered down brown paint I streaked and weathered the costume all over. This gives the costume a more authentic look. A costume that looks too clean doesn’t look like it is “real”. I wanted my Valka costume to look like something that a women in the wild could make using crude tools. I am usually trying to make my costumes very clean and uniform. I had to resist the urge to make it look to regular and even.
Under the top I have a burgundy turtle neck shirt.
The shoes are a pair of thrift store brown suede boots.
There is a cape that was made from a rectangle of burgundy gauze fabric that I tattered at the bottom and sprayed with a black mist of spray paint. The cape is glued to the top of the shoulders under the shoulder armor.
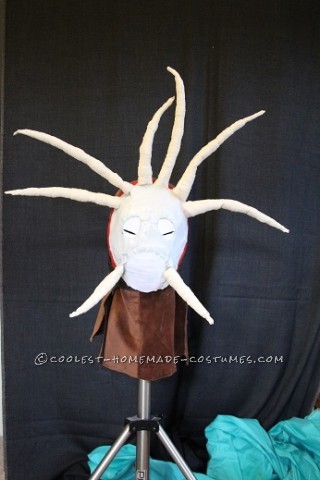
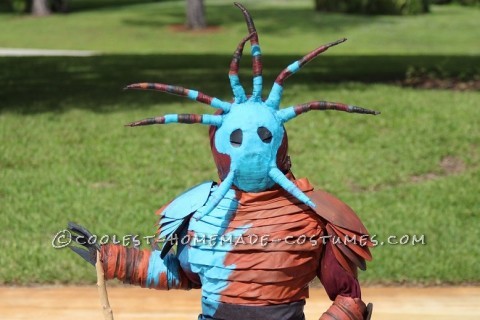
The base of the mask is butcher paper and duct tape. This was formed over a wig block (mannequin head). This part of the headpiece just covers the face area. Once I was satisfied with the size and shape of the mask, I added eye holes and a mouth section. This was done by cutting out the eye and mouth areas and then taping them back in place with duct tape on the inside of the mask. The eyes are slightly recessed, but the mouth section is replaced level to the area it was cut from.
I made the horns for the top of the head in pairs of two to give them stability when attached to the head. The inside is a mid strength wire with a strip of quilt batting covering it. The wire and batting were then covered with strips of bias tape. A stretch fabric would have worked also, but the benefit of using bias tape is that it can turn corners without bunching or folding. I started at the tip and wound the fabric tape down the length of the horn. At this stage, resist the temptation of making the wrap too even. Some areas are thicker than others.
Once the hons were complete, I glued them to the top edge of the mask. Goop adhesive was the one I used. It is strong but remains flexible.
The tusk was created in the same manner. When gluing in place to the sides of the mask, open up the section where the mouth and mask meet and pinching the base of the tusk fit the tusk in the opening and glue in place.
After the glue was dry, I coated the hole mask and horns with a construction sparkling patch material. This gives the mask a textured, crude tribal look.
For the mouth and eyes I used a heavy white paper to cover over the eye and mouth sections. I wanted these to be a little smoother. I could make the lines and stitches on the face with strips of paper, also. These paper pieces were glued on with white glue. At this time I cut the slits for the eyes making sure they were even. I used a razor to cut through the layers.
The mask is base coated in teal craft paint. Using images from the How to Train your Dragon movie, I painted on brown , burgundy and orange stripes on the horns. Once the paints were completely dry, I lightly brushed a very watered down brown paint to give the facial features shadowing and more definition. This enhances the crude tribal look of the headpiece.
The back of the headpiece is a simple fitted hood that I made from a heavy burgundy fabric. After the mask part was done, I glued Velcro to the inside edge of the mask. The mask Velcros onto the hood. My hood fits over the head and closes at the side neck.
The back of the headpiece is a simple fitted hood that I made from a heavy burgundy fabric.
For a well fitted hood, try on the hood inside out and trim away areas where there is excess fabric and then resew together. Do this before adding the Velcro.
After the mask part was done, I glued Velcro to the inside edge of the mask. Then mask Velcros onto the hood. My hood fits over the head and closes at the front of the neck.
This was not incredibly difficult or expensive to make, but it took enormous amounts of time and patience to put together.

Related costumes:
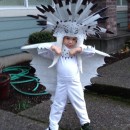 Preschooler’s Detailed Homemade Boss Dragon Costume
 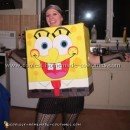 65+ Coolest Homemade SpongeBob Costume Ideas
 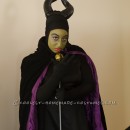 Homemade Maleficent The Magnificent Costume
 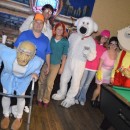 Awesome Family Guy Group Costume
 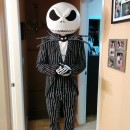 Amazing Jack Skellington Nightmare Before Christmas Costume
  Creative Tim Burton’s 9 the Movie Costume
 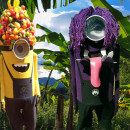 Make Your Own Awesome Minion Costumes
  Jessica and Roger Rabbit Couple Costume
Your comment has been sent successfully.