This year I decided the costume theme for our family was going to be Disney’s Frozen.
I was completely mesmerized by Frozen (like the rest of the world) and knew I had to make that dress. More than that, I felt like Elsa’s song ‘Let It Go’ helped me on a personal level as well (I’ll go more into that on my Elsa tutorial/submission). Even though I typically don’t make costumes I know everyone will be wearing, I decided I had to this year for a few reasons:
- My toddler (20 months) is the perfect size to portray an accurate life-sized Olaf
- He loves the movie (and warm hugs)
- Even though I knew there would be a million other Elsas (and Olafs) running around, I also knew most of them would be little girls that I could inspire and give confidence to, the same way Elsa did for me (tear).
I started Olaf about a week before the costumes had to be completed for our Church Halloween Party. This year it was really early in October, so I had less time than planned ( I planned to start earlier but Elsa took FOREVER .
**note to self- everything ALWAYS takes at least 3x longer than planned**.
I wish I could say I had a pattern that I created for Olaf, but I just kind of winged-it. Almost everything I used was fabric and supplies I already had, so I created it based on my resources.
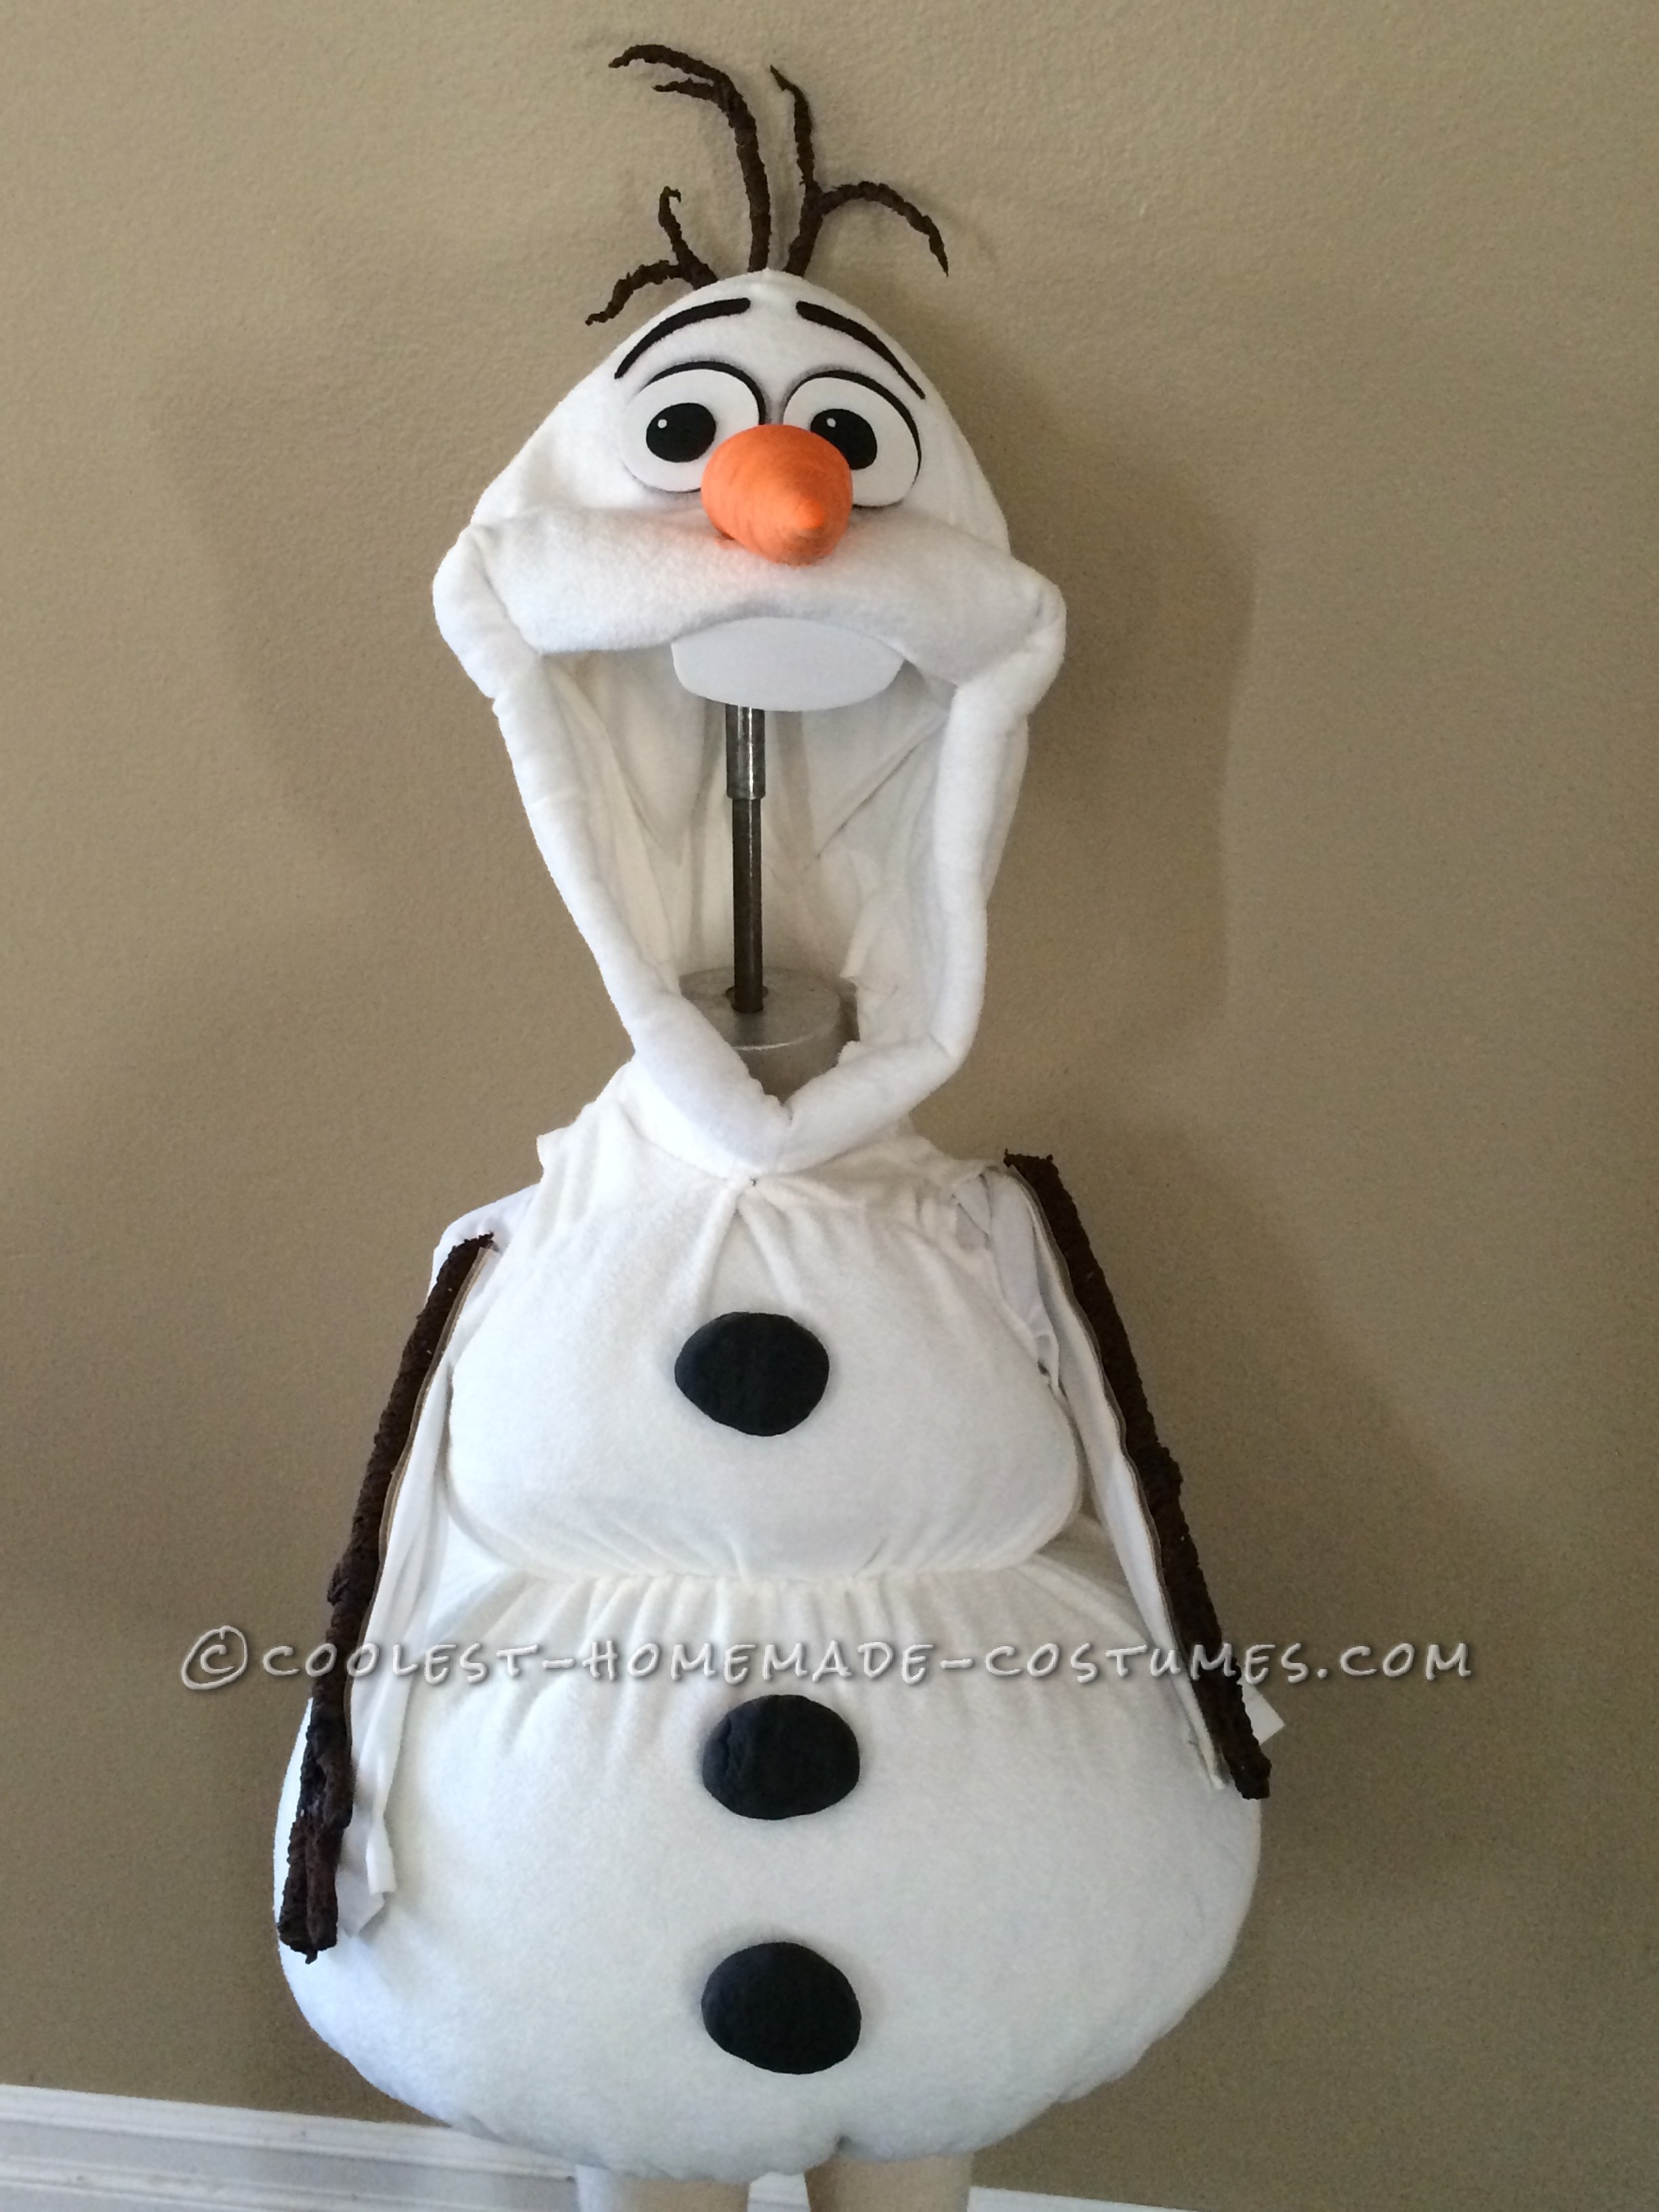
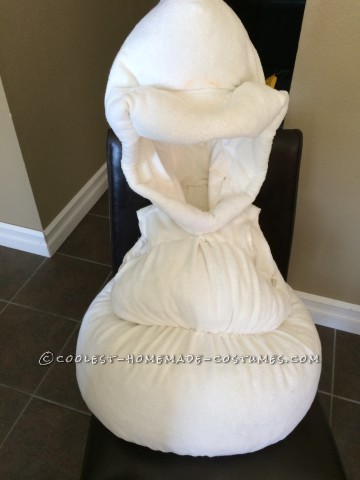
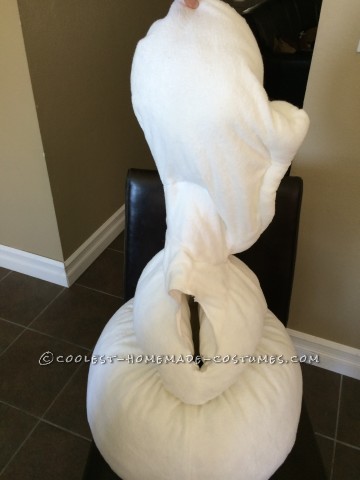
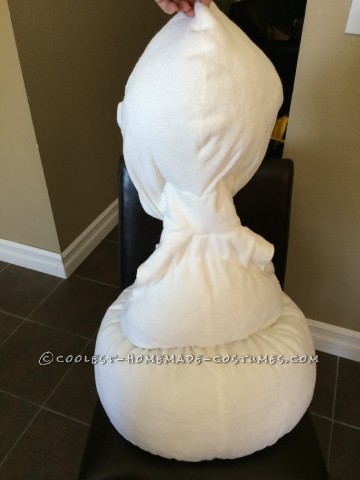
Body part 1: I thought the body of Olaf would be a piece of cake, but I still ran into a few snags. I got a general idea of the length I wanted by measuring my wiggly toddler and adding length to accommodate the fullness of the snowman shape. I also tried one of my hoodies on him to see if that length/width gave it the right fullness if I cinched in the waist, as well as getting a general shape for the head. That worked pretty well, but since he is so tiny I had to use one of his hoodies as a template for the neck, shoulder width, and armhole placement.
I then laid the reference hoodie on top of my fabric and traced half on the fold with a removable fabric marker. I did the same with the toddler hoodie to make adjustments. I then made a straight a-line shape from under the armhole to the hem. The lining was exactly the same except instead of a line it was a straight piece and a little shorter to give the bubble shape when attached at the hem.
Body part 2: I sewed the lining and outer part separately and added a casing with elastic on the inside of the self-fabric at the waist. I then attached the self-fabric and lining pieces at the hem. Next came the stuffing. I bought a bag of no clump stuffing from WalMart and used almost the entire thing on the body (I had to save some for the head). After getting the fullness I wanted, I tried it on my toddler who would run from me every time I tried to put it on him. After getting it on I realized that it was too long and that the weight of the costume was pulling at the shoulders. You could also see where the elastic was separating the two halves (which didn’t look very snowman-like) and it was almost touching the floor.
Solution:
- I took a few inches out of the shoulder and reinforced it with the seam allowance instead of removing.
- I chopped off part of the bottom, and re-sewed hem
- I sewed the top and bottom portions together about 1” above and below the elastic to both shorten the length and hide the elastic. After finishing the armholes I stitched a line to keep the stuffing from going into the shoulder, thus keeping the rounded shape I wanted. **This costume was a lot like making a stuffed animal (which I have never done) so there was a lot of trial and error involved.**
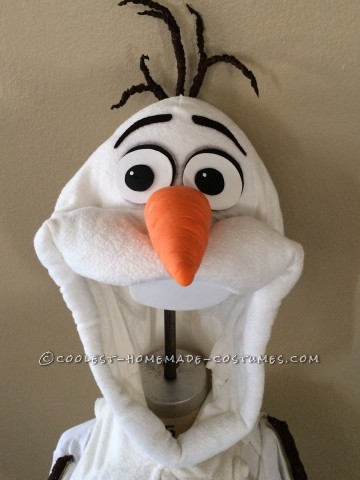
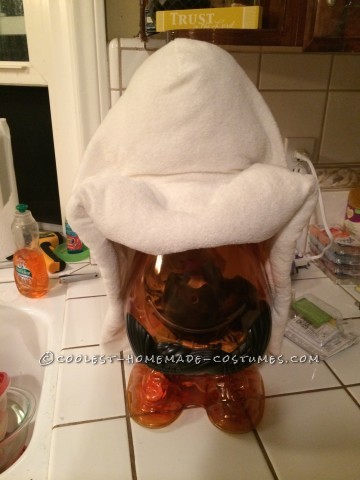
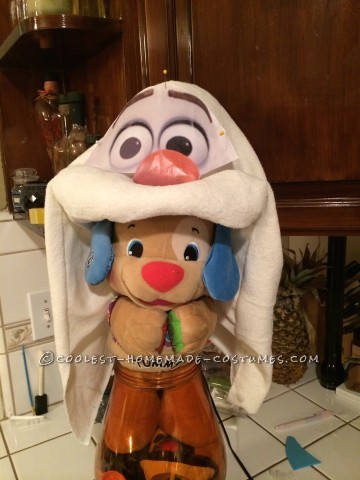
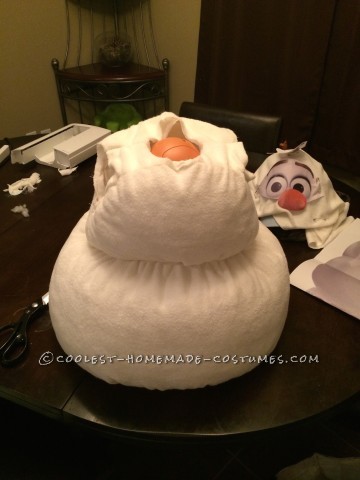
Head part 1: (Heads’ up!) I was dreading the head. I knew that the head could make or break the costume. The proportion and curves had to be right. It had to be structured to allow an unobstructed line of sight. And to make it even more seemingly impossible, it had to be comfortable enough for a 20 month old to wear and keep on. In a nutshell, I based the basic shape of the hood on an adult hoodie and added a little extra to the height and a few inches to the back to give a more rounded shape. I used a baseball cap to gage how tall it needed to be and how much to add to the front of the hood for the mouth. I attempted to try it on my toddler, but he was not having it, so I resorted to using a large Darth Vader Mr-Potato-Head with a stuffed toy shoved in it that had a similar head size as my son.
Head part 2: (Dun-dun-dunnnn!) The shape of the head was completely trial and error. The basic shape was created by hot gluing a white baseball cap to the front of hoodie at the top, adding stuffing, gluing some more… glue… stuff… repeat, glue… stuff…repeat. I ended up doing most of this while sitting on the toilet (not using, just sitting on) while my son was playing in the bath. LOL!
**Helpful Tip: To have a guide for the proportion I scaled and printed an image of Olaf’s head in the size that I wanted, cut it out to see the scale of the top of his head, mouth, and all his facial features** After gluing I had to hand tack a few places around the cheeks and stitch a channel to create the shape of his mouth. Lastly I attached the head. This was harder than you would think since the body was so puffy.
Head part 3: (The fun part!) Now that the head was constructed, it was time for some arts and crafts. The eyes were made from black and white foam sheets and glazed with Mod Podge. **Note: Fabric glue doesn’t work on foam (I learned the hard way) – use e6000 or goop** I dabbed on a dot of paint for the twinkle in his eye.
For the nose I used orange Model Magic to get the right curve. I had to prop it up with various toys as well as a foam curved racetrack to let it dry. Otherwise it would have been flat on the bottom. (I wish I would’ve taken a picture, but it was late and my mind was mush at that point) Since the nose was thick I used a whole package. It took a few days to completely dry and cracked a little on the bottom. The eyebrows were made with felt and the tooth with multiple layers of white foam sheets glued together and painted with the metallic pearl white I used on Elsa’s corset.
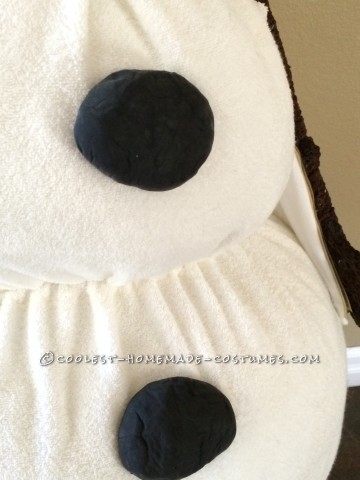
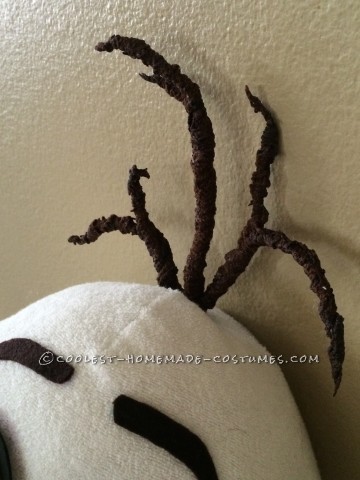
Sticks and Stones: The stones were the easiest part of the costume and were created with black Model Magic. Honestly I almost completely forgot about the stones until I saw a picture of Olaf at the store. I knew something wasn’t quite right but I couldn’t put my finger on it. For the sticks on the head I used thick floral wire and wrapped it with lots of fabric glue and a brown crocheted trim I already had.
I did the same thing for the arms, just without the wire. Instead of wire I made cording by gluing and rolling the trim. **This was a very messy project.** After drying overnight I glued the arms to Velcro and sewed Velcro to the sleeves of a white long-sleeved onesie. This allowed the arms to be removed to get the rest of the costume on, as well as being able to wash the onesie (which is crucial with a toddler).
Just when you think you’re done…
Our church Halloween party was the first time I was able to get my son to wear the costume with the head attached. Despite all my efforts the hood would not stay on very well (it didn’t help that my toddler kept tilting his head back to make it fall off). We were lucky to get one good picture of him wearing the head that night. He also spent most of that night running around in his Olaf costume (which looked pretty hilarious). Apparently he took a tumble and rolled a few times while grandpa was chasing him. Luckily he was fine, but the costume wasn’t as lucky. The nose split in a few places which I had to fill in with more Model Magic. It took longer to doctor up than it took to make the nose the first time around.
I had to figure out a way to keep the head on. I bought a white foam cowboy hat from the 99 cent store and cut out the rim of the hat. I sized it to my son’s head and hand stitched it inside the hood. This seemed to do the trick. The next time he wore it he kept the head on most of the time (which, for a toddler, is amazing).
So that is how I built my little snowman…
Not enough hours in a day: I wanted to make a harem type pant with a bubble hem to emulate his legs as well as make his trick or treat pail a snow flurry cloud with snow dangling from it but ran out of time.
My Favorite part about creating Olaf, was learning how to construct a stuffed animal type costume and have it turn out exactly how I envisioned it. I now feel that I can tackle any project and am excited to construct more authentic costumes in the future.
My Favorite part about my son being Olaf was every time I tried the body on him, he would run around like crazy and have so much fun. At first he didn’t want it on and would run from me, but once we put it on and took him to the mirror for the first time, he loved it and would run to the mirror every other time he had it on. Also, once the costume started to really look like Olaf, he would come over and point to it and start hugging the Olaf costume. That was a tender moment because to him that was the real Olaf.
The reaction we got in response to the Olaf costume was amazing. Several parents complimented it and asked where we got it, only to be even more amazed that it was homemade. The commercial versions of Olaf currently in the market are not that great, so people were excited to see something that really looked authentic and true to the character. Several young Elsa’s got their pictures taken with my little Olaf. :)
I had a lot of favorite moments this year as this was my son’s 1st year trick-or-treating. It was so fun seeing his excitement when people loved his costume, when he got to pick out a treat, and as he proudly carried his pail. It was exciting to see him evolve from running from the costume to wanting to wear it again. That’s what makes it all worth it. :)


Related costumes:
 Authentic Frozen Family Costume – Elsa, Olaf, and Kristoff
 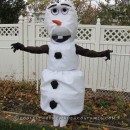 Olaf Costume
 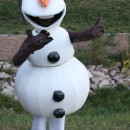 Coolest Olaf Who Likes Warm Hugs Costume
  Coolest Homemade Elsa Costume – The Real Snow Queen
 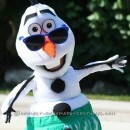 Coolest Frozen Snowmen Olaf and Marshmallow Couple Costumes
  Frozen Elsa Costume That Warmed My Six Year Old
  Cool DIY Charmander from Pokemon Hoodie Costume
  Best Elsa Costume Ever
I’m wondering if you would share a copy of your pattern or can I purchase a copy of your pattern?