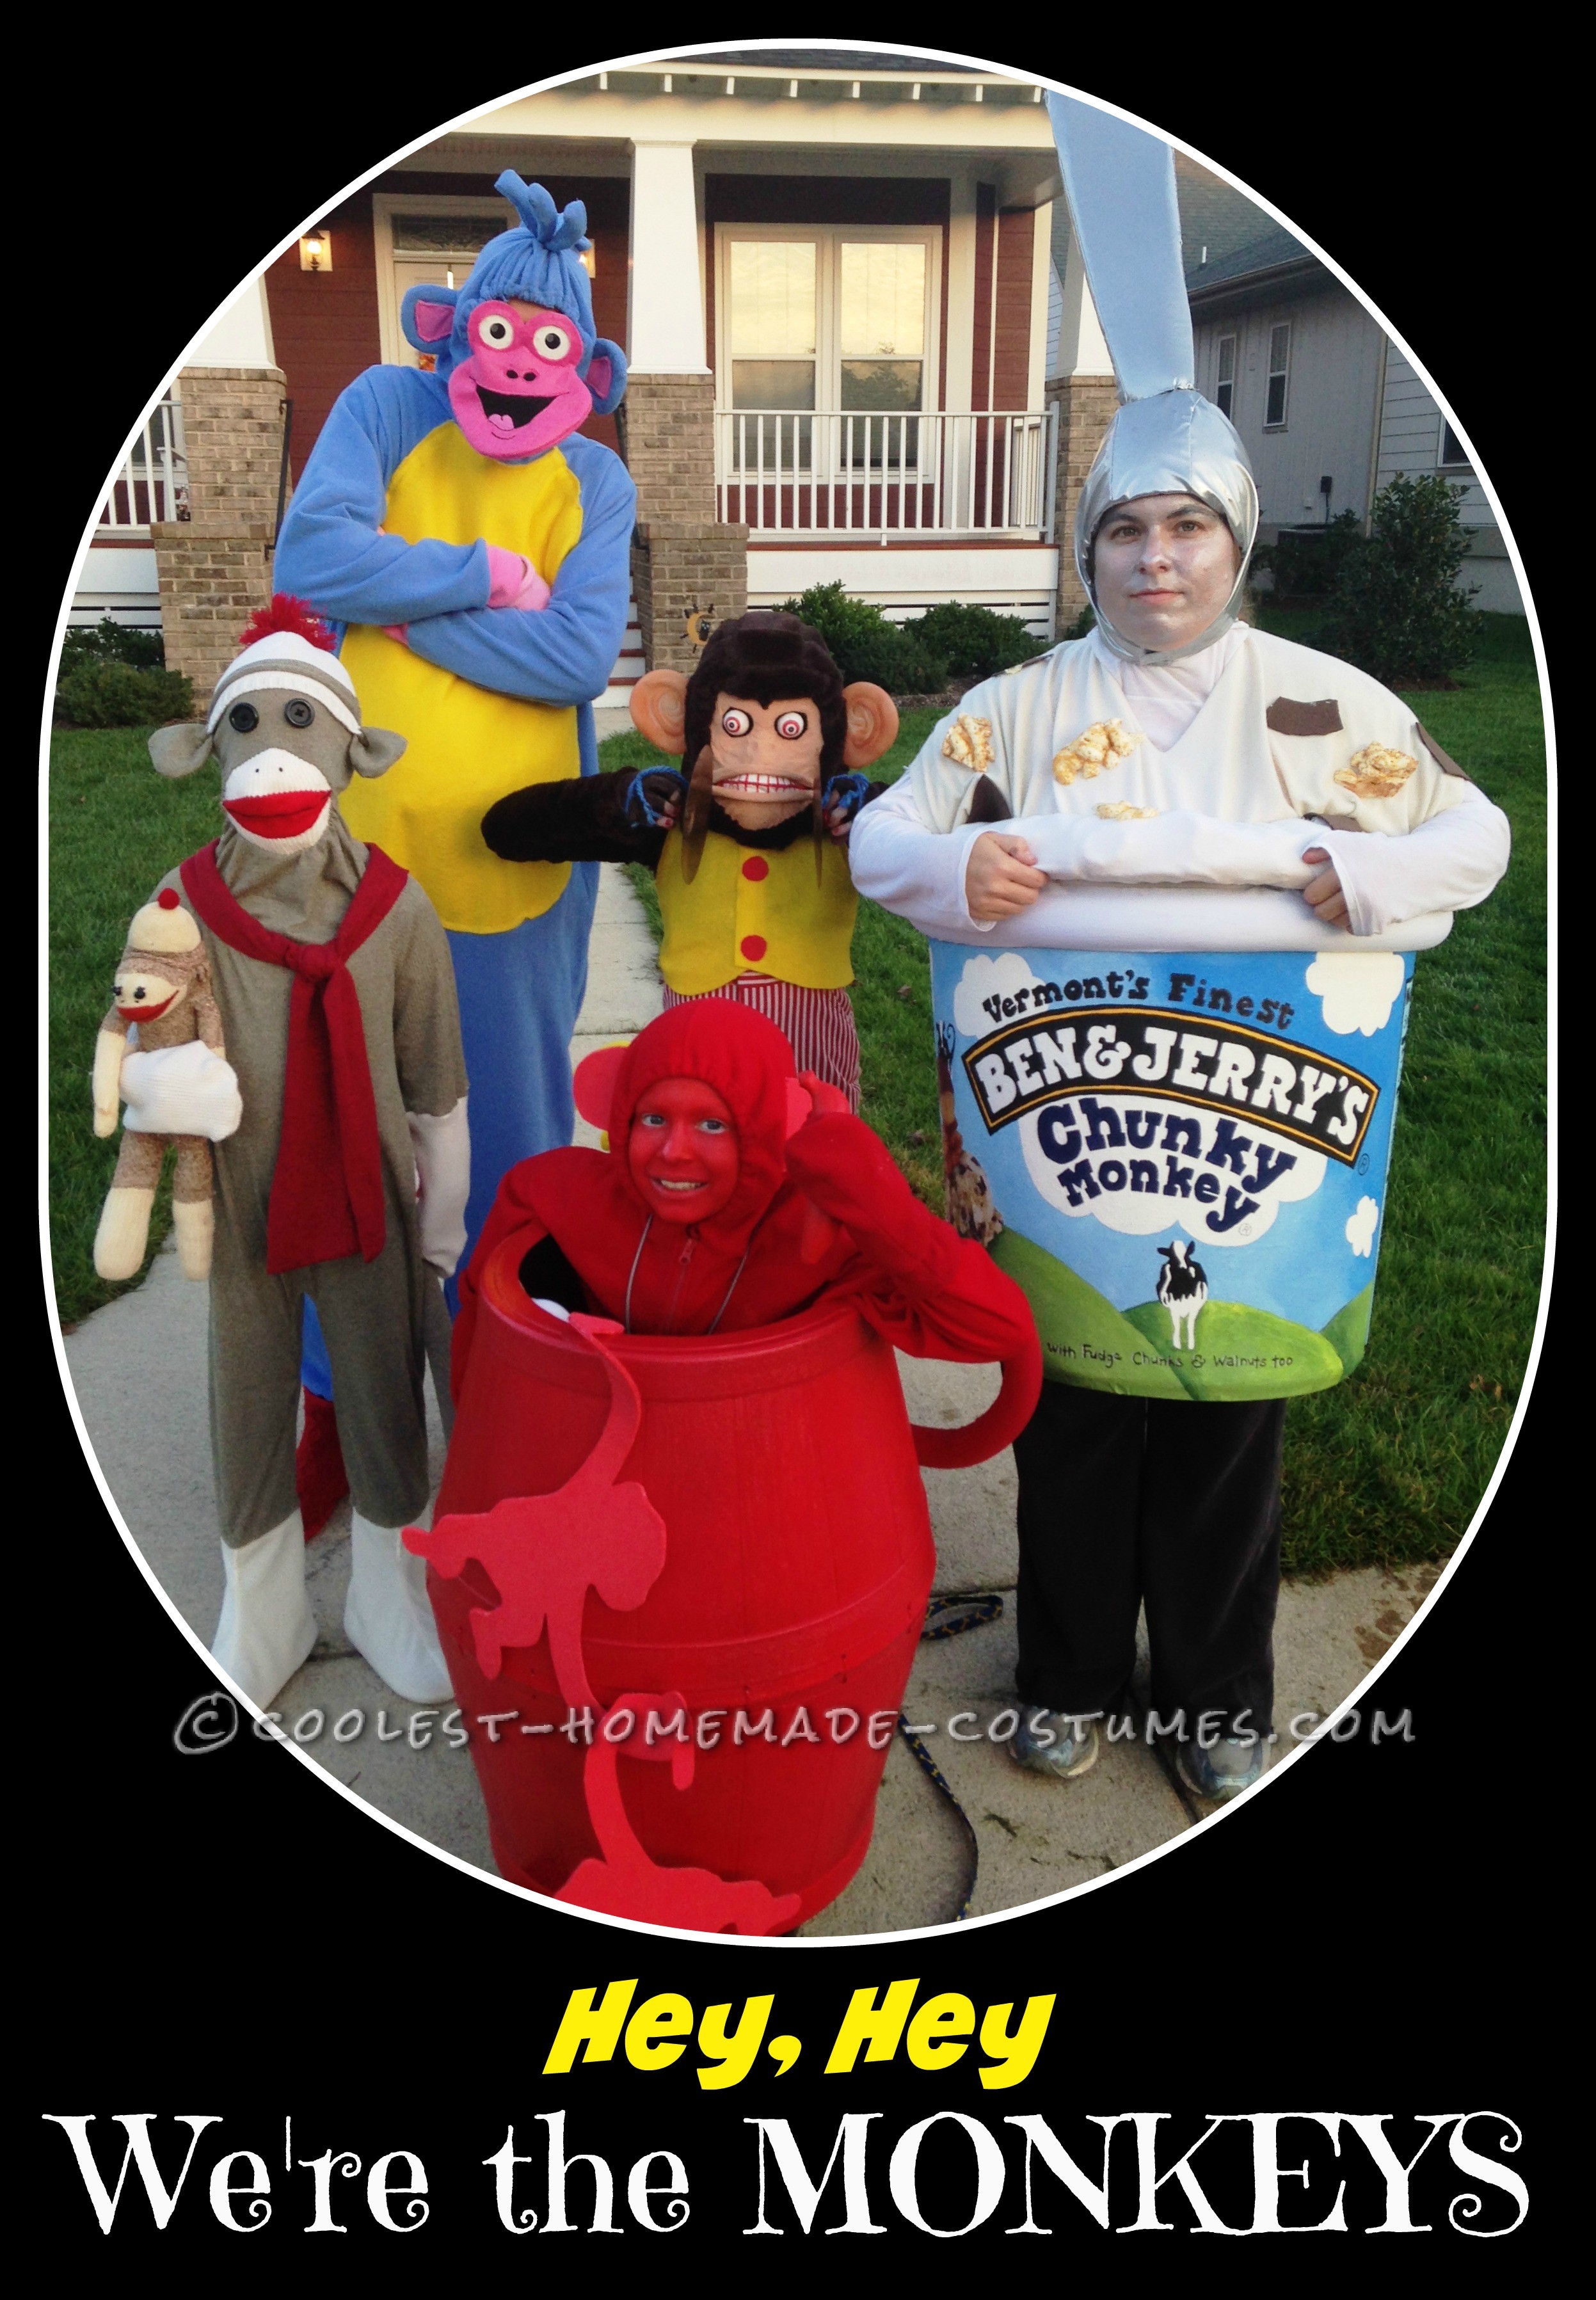
Inspired by a sock monkey costume I saw in a catalog a couple of years ago, I thought of our family’s costume theme this year: “Hey, Hey, We’re the Monkeys!” We selected the sock monkey, clapping monkey, barrel of monkeys, and Boots the monkey (from Dora the Explorer) for my kids and husband. After much consideration, I finally thought of Ben & Jerry’s ‘Chunky Monkey’ ice cream for my costume, and I loved the idea. Here is how I made each of the costumes:
Sock Monkey
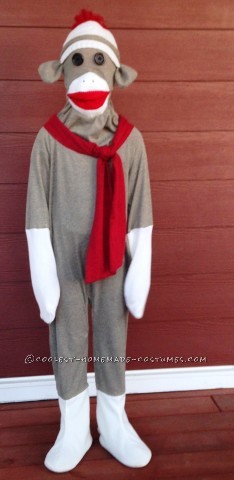
I found the brownish material at a fabric store. I purchased a kids’ sleeper PJs from the thrift store and used a seam ripper to disassemble it into my pattern. Then, I pinned each of the pattern pieces to my fabric and cut them out. Next, I sewed the fabric together to create the body of the sock monkey. My son had a full face mask that I used as my pattern for the sock monkey mask.
I purchased a cream colored sweater from the thrift store and used that fabric for the sock monkey arms as well as part of the mouth and butt. I used cream colored slippers from the thrift store for the feet (sewn to the legs). I also found a red scarf at the thrift store and sewed it to the neck of the body. I attached black buttons to the face mask and created the mouth out of a paint mask to which I sewed the cream sweater fabric, red felt, and embroidered with black thread. I then attached the mouth to the face mask.
I found a cream-colored hat at the thrift store, and I sewed a stripe of the brown fabric (with a cord enclosed) to the hat. I attached a red pompom, which I created from tassels I removed from the red boots that went with my husband’s costume. I made some ears out of the brown fabric and attached them to the hat. I made the tail from foam (meant for wrapping pipes) covered with the brown & cream-colored sweater fabrics. The butt was made from the sweater fabric as well as red fleece fabric recycled from some old pants. There was a lot of hand stitching involved, and the entire process was time consuming, but it turned out adorable, and my daughter loved it.
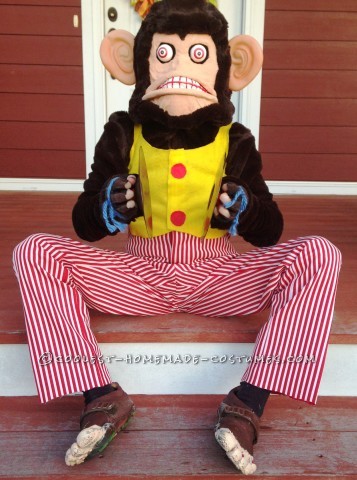
Clapping Monkey
I found an adult-size fuzzy brown jacket from the thrift store to create the monkey fur, and I adjusted it to fit my daughter. I found the perfect red and white striped pants on EBAY, but they were also adult size and had to be adjusted. I created the yellow vest out of felt using one of my daughter’s shirts as a pattern. I sewed the back of the vest to the pants, sewed Velcro to close the front of the vest, and hot-glued ‘buttons’ made out of felt. I tied some elastic straps to the belt loops on the pants to create suspenders so they would stay in place.
I made the feet using Vibram shoes I found at the thrift store for $3. I spray-painted them brown, painted the toes flesh color with acrylic paint, and painted the toe nails with red nail polish that I also used on my daughter’s fingernails. I cut the fingertips off of brown gloves that I found at the thrift store for her to wear. The mouth was made from a paint mask that I painted red and white. I hot-glued it to a ‘rally mask’ which I found at a thrift store and spray-painted gray. I used hot glue to apply two pieces of felt to the mask to create the texture of the face. Using hot glue, I wrapped the felt around two pieces of cord to create the lips next to the mouth.
I then painted the felt with the flesh colored paint that I used for the toes. I painted/Sharpied Styrofoam balls for the eyes and cut them in half with a knife. I hot-glued black pantyhose behind the eye openings of the mask, and then hot-glued the eyeballs to the front of it. Next, I hot-glued the hoodie from the brown coat around the mask, and then I sewed on jumbo ears from Amazon. The cymbals were purchased from EBAY. I was so excited when this costume came together just like I had hoped. It just brought a smile to my face.
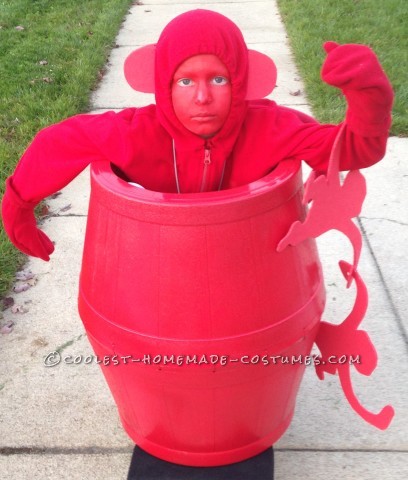
Barrel of Monkeys
The barrel was made from two barrel-like planters from Walmart. My husband attached them together with silicone & zip-ties, and then he cut out the hole on top. I spray-painted the barrel red and duck-taped down the ends of the zip-ties inside. My husband screwed the barrel to a dolly so that my son could be mobile. We attached a dog leash to a screw eye in the dolly and used that to pull him around the neighborhood. I bought a second-hand red fleece hoodie and red leggings for his outfit.
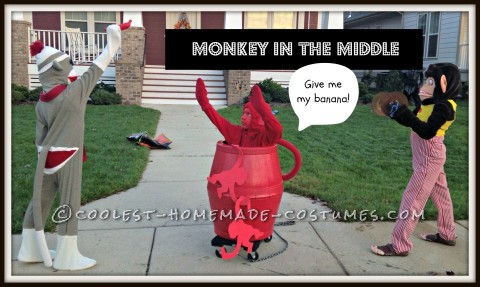
I found red slippers on EBAY and red mittens at the thrift store. I also spray painted a fake banana for him to use as a prop. His tail was made with pipe foam stuffed with a wire hanger and covered with red fabric that I had on hand. I drew a stencil for the monkeys and cut them out of two pieces of red craft foam and one piece of red poster board glued together. I used the leftover foam to make ears that I sewed to the hoodie. I completed the look by painting his face red. We also taped portable speakers inside of his barrel so that we could play “Hey, Hey, We’re the Monkees” through my iPod as we walked around.
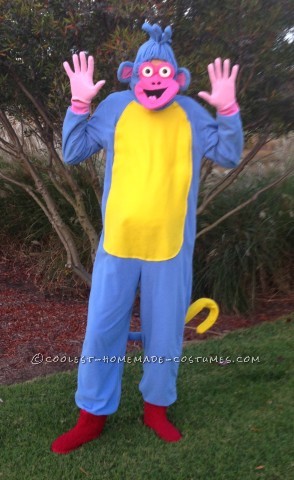
Boot the Monkey
I purchased Eeyore sleeper PJs from E-bay and cut out the belly and feet to use fabric to create the ears, hair and tail. The tail was once again made from pipe foam and a wire hanger & fabric. The belly was made with yellow felt, and I attached Velcro at the top for my husband to get into the outfit. I removed pink fabric from the Eeyore ears, inserted pipe cleaners, and transformed them into Boots hair. I had to add a third one.
I made monkey ears using blue and pink fabric removed from elsewhere on the sleeper. I purchased the pink gloves & red slippers from a thrift store. I constructed his mask with pink felt, black pantyhose, black embroidery thread, white paint & a pair of plastic glasses.
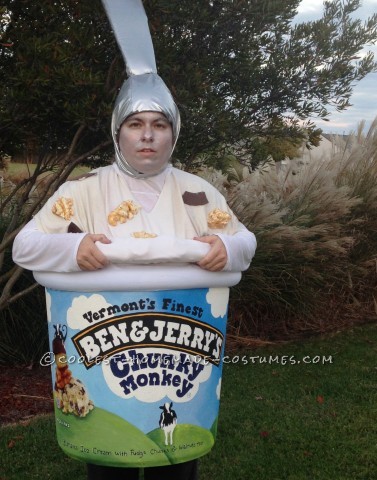
Chunky Monkey
Part 1 – Spoon Hat & Ice Cream
I found a hoodie hat at the thrift store and covered it with silver fabric that I had on hand. I created the spoon handle with silver fabric, foam, and a wire hanger. I made the ice cream poncho from our old pillowcases and attached brown craft foam as the chocolate chunks and pieces of painted “great stuff foam” as the walnuts. I stuffed the ends of the pillowcases with 2 half-rings of hardened ‘great stuff foam.’
Part 2 – Ice Cream Carton
For my container, I bought a heavy duty trash can from Lowe’s, and my husband cut off the top portion and a hole in the base for me. I glued (with decoupage glue) canvas (a painter’s drop cloth that I had on hand) around the trash can and primed it. I sketched out the images for the carton and stayed up all night the night before Halloween to paint it (with acrylic craft paint). I used sharpies as well for some of the text. I scanned an ice cream carton and printed the pictures of Ben & Jerry as well as the ice cream, nuts, and chocolate, and then I decoupaged (glued) them on. The lip of the carton is a pool noodle covered with fabric that I attached with more hot glue. I wore it with suspenders from the thrift store.
Conclusion
Everyone loved the costumes, but it was especially fun when we encountered a few people who recognized our family as the one who had dressed up as Star Wars characters the year before simply based on the complexity and uniqueness of our costumes as well as the fact that we had another child on wheels. The month of October can be quite stressful while I scramble to get our costumes done in time amidst the normal hustle and bustle of everyday life, but it is so exciting and rewarding when they are completed and I see my vision come to life. Dressing up together is such a fun experience for our family each year. I hope you enjoyed our latest ensemble.

Related costumes:
 Coolest Homemade Monkey Costumes
  12 Coolest Homemade Parrot Costume Ideas
 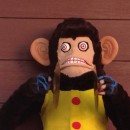 Coolest Homemade Clapping Monkey Costume
 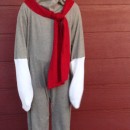 Coolest Homemade Sock Monkey Costume
 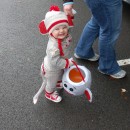 Cutest Sock “Hop” Monkey Halloween Costume
  Unique Bald Eagle Halloween Costume
  Hunter’s Trophy Wall Taxidermy Group Costume
 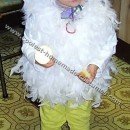 8 Cool DIY Chicken Costumes
Your comment has been sent successfully.