
Here’s how I made these Minion costumes – as is customary in our house, early October brings about the conversation of “What are we going be for Halloween?”. With an 11 year old girl and 8 year old boy, the options always vary. From princesses and witches to mummies and ninja’s (and everything in between!!), Halloween gets the creative juices flowing.
This year’s discussion gravitated toward those lovable characters from Despicable Me, The Minions. Both kids liked the idea of the homemade kids couple costume and dad (me!) liked the challenge. The following pages detail “The Making of the Minions” in our house.
The goal for the Minion costumes was to make them look as realistic as possible without breaking the bank. All the materials used are readily available and the total cost was about $35 for each… bearing in mind that I already had many of the materials on hand.
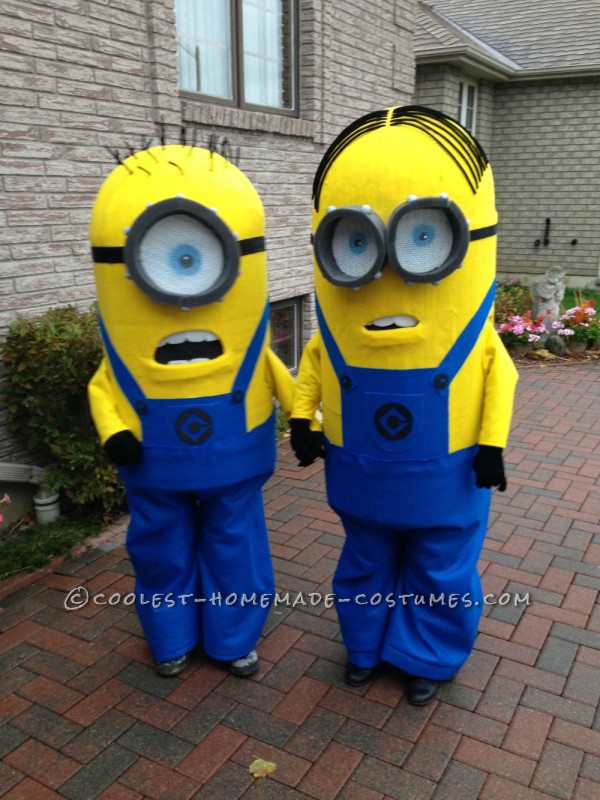
They turned out great and the kids received a lot compliments and “ooh’s and ahh’s” while out trick or treating. I even had a few offers inquiring on purchasing them!!
Without further ado, let’s get to it!.
The Minion Costumes Heads
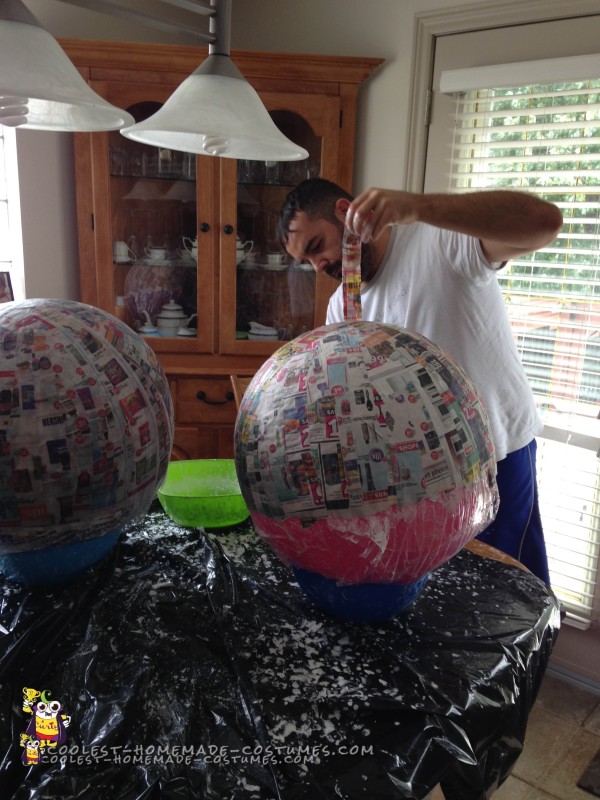
Given that Minions have a rounded head and cylindrical body, how to make these provided the largest challenge. The final product had to be sturdy enough to withstand being worn by two kids, but light enough to be comfortable for those same kids. The solution for the heads… paper mache! That’s right, newspaper, flour, water and time!!
To make the rounded heads of the costumes I used two exercise balls inflated to the desired diameter. The diameter was a number large enough to fit both kids without being too large. For my kids, this was approximately 18” or 57” in circumference. Once the balls were inflated to the desired size, I wrapped them in plastic wrap (Saran wrap). This was done so that the paper mache would not stick to the exercise balls.
The next step was to make my paper mache mixture. I used a water and flour mixture that was a smooth consistency without being to runny. No exact science, just experiment with it. With the mixture created the process of applying the newspaper strips to the exercise balls commenced. One important note here is to ensure that the valve of the exercise ball is located where it will NOT be covered by the paper mache.
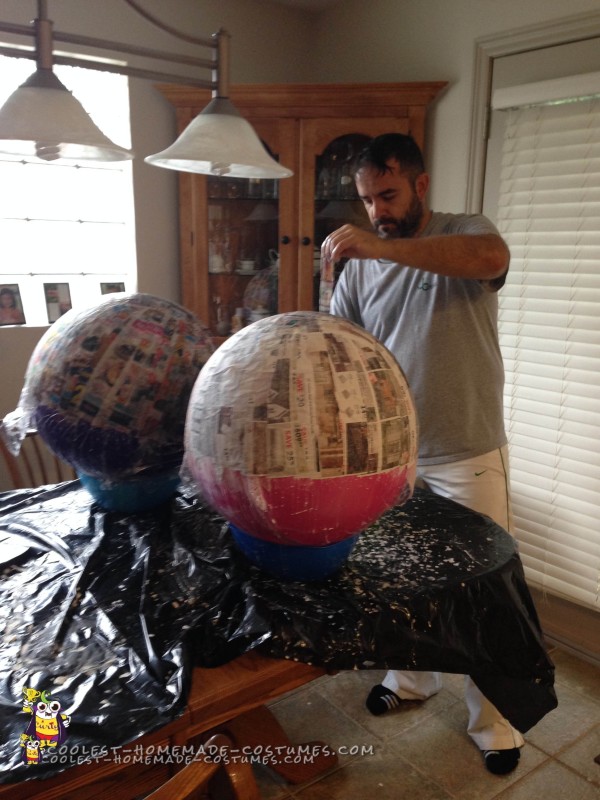
Paper Mache Time!
I applied 5 layers of paper mache to each ball, ensuring that each layer was completely dry before applying the next. Failure to ensure complete dryness can result in a nasty smelling, moldy product… not cool!
Once the 5 layers were complete and dry, I released the air from the balls via the valve (that’s why you don’t want it covered!!) I had my two round heads. Some trimming and cutting was done to make them even and red duct tape (way stronger than standard grey duct tape) was used around the bottom edges to reinforce the structure.
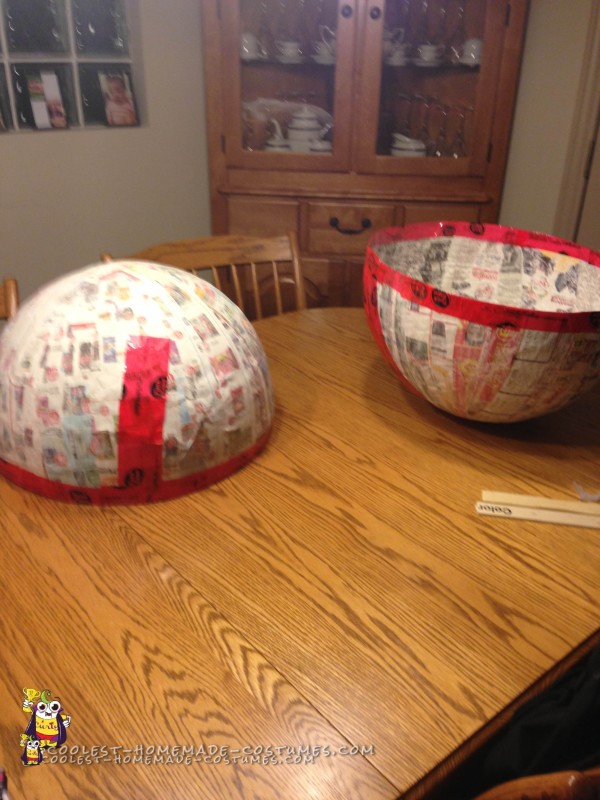
Finished Paper Mache
Finally a layer of expanding insulating foam was added to each head. Once expanded and hardened, this provides a very strong rigidity to the heads without making them heavy.
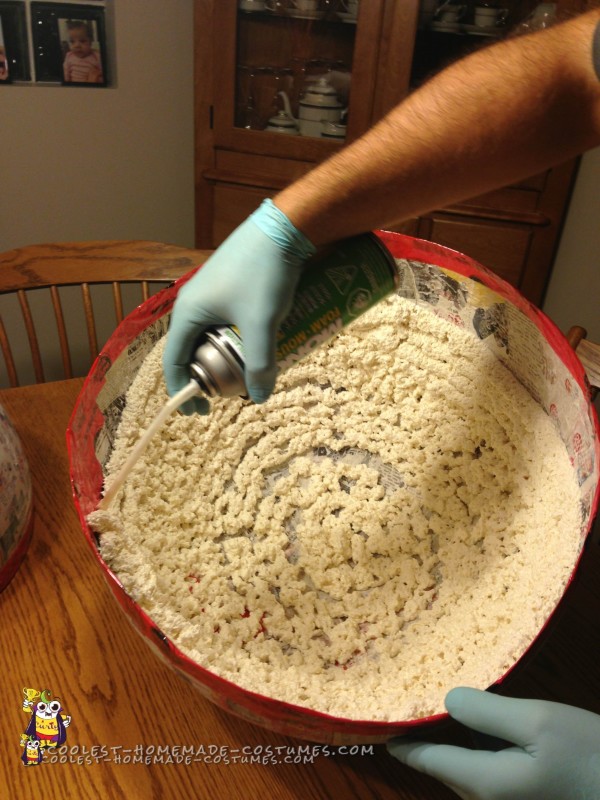
Expanding Foam to add solidity
Minion Costumes Body – Part 1 – The Frame:
With the heads complete, I set about making the bodies out of standard corrugated cardboard. You’ll need some large pieces so visit a local grocer or warehouse where they’ll give it to you at no cost.
The cardboard was rolled over a large cylinder (4” abs pipe I had laying around) to allow for making the cylindrical shape of the body. The length of the cardboard was cut to the circumference of each head and the height was cut to accommodate each child… ideally a length starting just above the top of the head and just above the knee.
Once cut, the cylinder was taped together and circular pieces of cardboard were cut and taped to the top/bottom of the cylinder on the inside. This helped add rigidity and structure to the body.
Sizing up the frame for strap placement
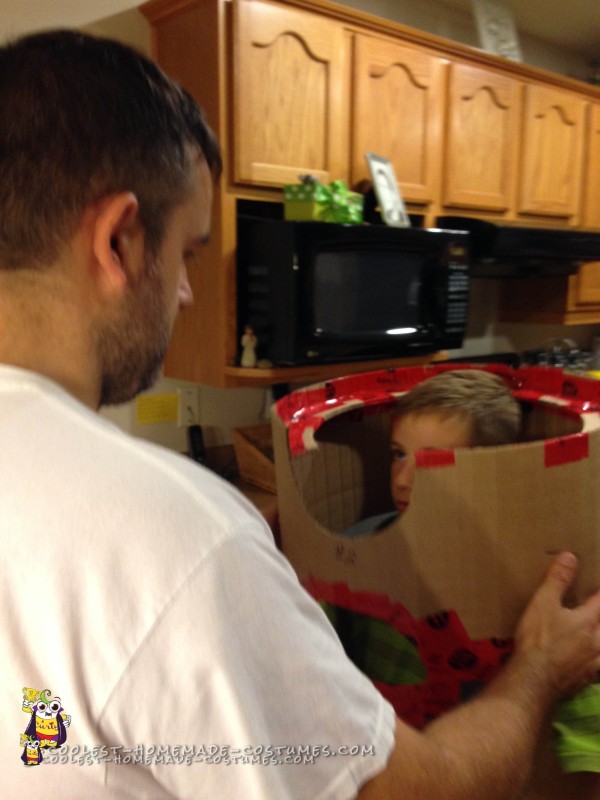
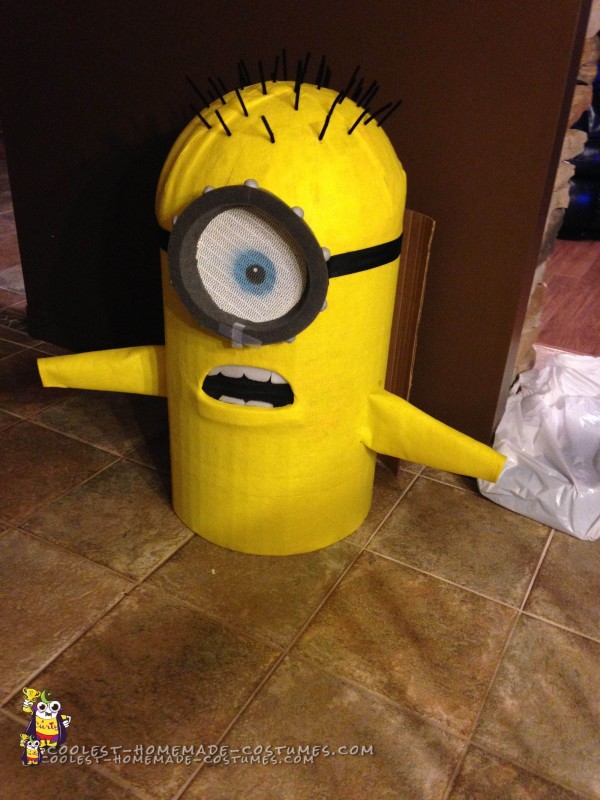
The next step was to temporary place the head on the body and draw on the eyes and mouths. Ideally, the eyes should sit so the top half of the eye is on the head and the bottom portion on the body. The eyes and mouth were cut out using an x-acto knife.
Before final assembly of the head and body, the body was fitted to each child and the location of the straps were marked. I used some spare adjustable straps from gym bags. Ensure that the body sits so that the child’s eye level is even with the middle of the eye cutouts. The straps were fastened through small slits cut in the cardboard and reinforced with a few layers of red duct tape. For comfort, I also added some foam pads to the straps.
Once the straps are in place the arm holes need to be cut out. Ensure that they’re large enough to allow free movement and range of motion for the child.
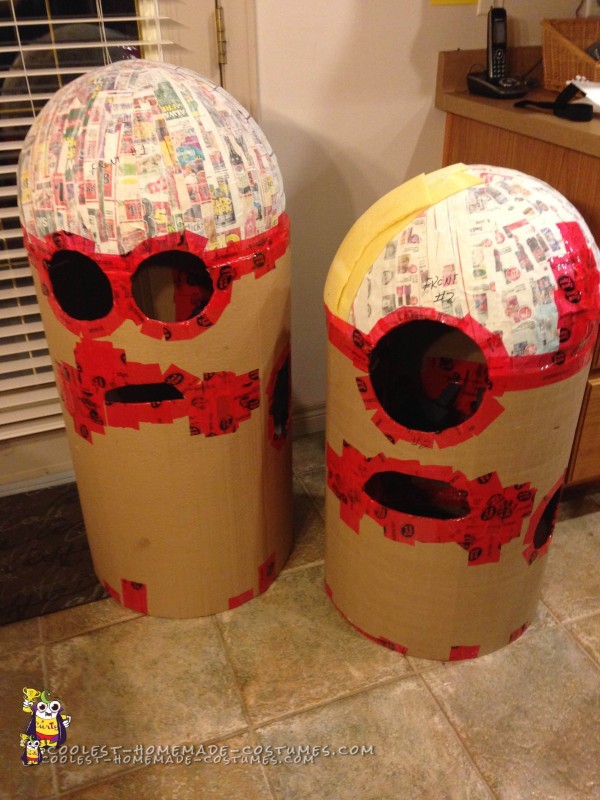
Assembled bodies for both
At this point the head and body were assembled using the same red duct tape… and a lot of it. Inside, outside, at different angle – whatever is needed to make it solid. Also, be sure to add a layer of the tape to all the cutouts (eyes, mouth & arms). This will help prevent the cardboard from splitting.
The Body – Part 2 – The Covering
With the head and body now attached, it was time to cover the costume. I opted to use yellow felt to give the costumes a “soft” look. If you decide to use yellow paint, it would be a good idea to make sure the last layer of your paper mache heads is done using standard white copier paper. This will greatly minimize the number of coats of paint required to hide the newspaper.
I used 3M Super 77 Multipurpose spray adhesive to attach the felt to the costume. It’s very easy to use and very strong. One large piece of felt was used for the entire costume. First it was adhered to the body, then the head was done but making small cuts to around the felt and adhering it in sections or strips.
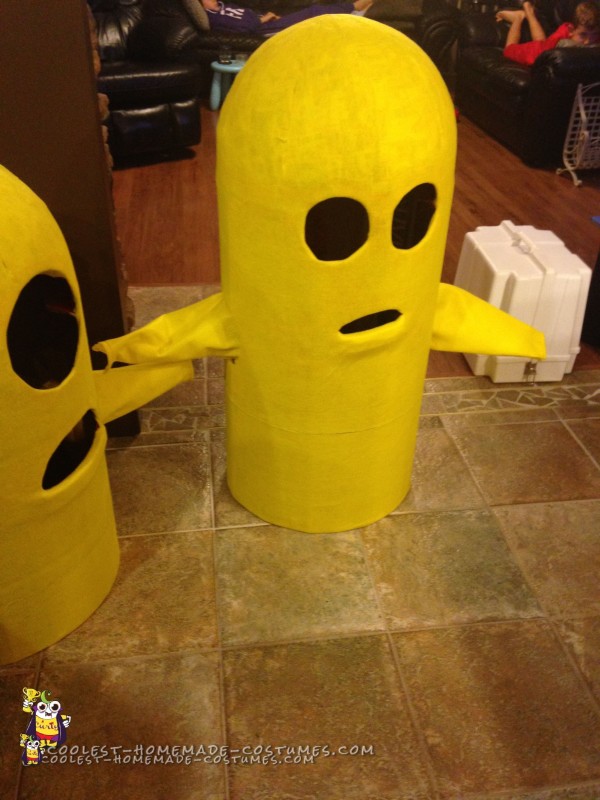
Covered in yellow felt with felt sleeves attached
Next, the eyes, mouth and arm holes were cut out. For these it’s best to cut a star-shape in the hole, fold the “leafs” back into the body and adhere using the spray on the inside. This ensures all the cardboard is covered in felt.
Finally, I had each child put on the costume and I measure the appropriate sleeve length for each. The sleeves were made with yellow felt and were large enough to fit in the arm cutouts. Make sure to make the length 3”-4” larger than required so they can be adhered to the inside of the arm holes.
Features – Eyes, Teeth, Goggles and Hair
The beauty of the costumes lies in the details and each of these features added to the completeness of the overall look.
Eyes
The eyes needed to be a material that would hold paint, provide good visibility for the child and ideally, “hide” the child from view. The material I ultimately used was drawer/shelf liner readily available at any dollar store. Its foam like material makes it light and paintable. Also, it contains a ton of spacing which makes visibility great. The material was cut approximately 1”-2” larger than the eye openings to allow for attaching to the body.
Since the lining I purchased was black, I spray-painted it white while leaving a small circle in the center for the eye ball. Once dry, I painted the small circle with a blue color (since I had it on hand) and left another smaller circle in the middle of eye in black.
Once the paint is dry, adhere the eyes to the body on the outside. Don’t worry about the edge since they will be covered by the goggles anyway.
Added Eyes, Teeth, Goggles and Hair
Teeth
The teeth were cut out of a think piece of white foam. It was left over foam from the shipment packaging of a PC I purchased. I cut a thin layer (approx. ½”) of the foam and each tooth was cut out individually. Each tooth was applied to the inside of the mouth using a hot glue gun. Doing the teeth individually provides nice depth and realism to the mouth.
Goggles
The googles were made using black foam. Again, the foam was left over from the PC packaging. I cut the foam in a 2” strip and used the spray adhesive to attach it to the costume. The “bolts” around the goggles are small foam decorating balls readily available at the dollar store. They were cut in half, painted silver and attached to using the 3M spray.
Finally, the strap for the goggles was a gym bag or car seat strap. Cut to length and fastened to the costume using hot glue.
Hair
We had some fun with the hair for the costumes as each kid was given the option of hair styles. My son opted for the small spiked hair look while my daughter wanted the more refined “slick” look.
I used standard black pipe cleaners for the hair and they were attached my making small holes in the head using a finishing nail. The pipe cleaners were then fed into the hole at a depth that would not allow them to fall out. For the slick look I also added a small drop of hot glue on the end to prevent the hair from moving.
The Overalls
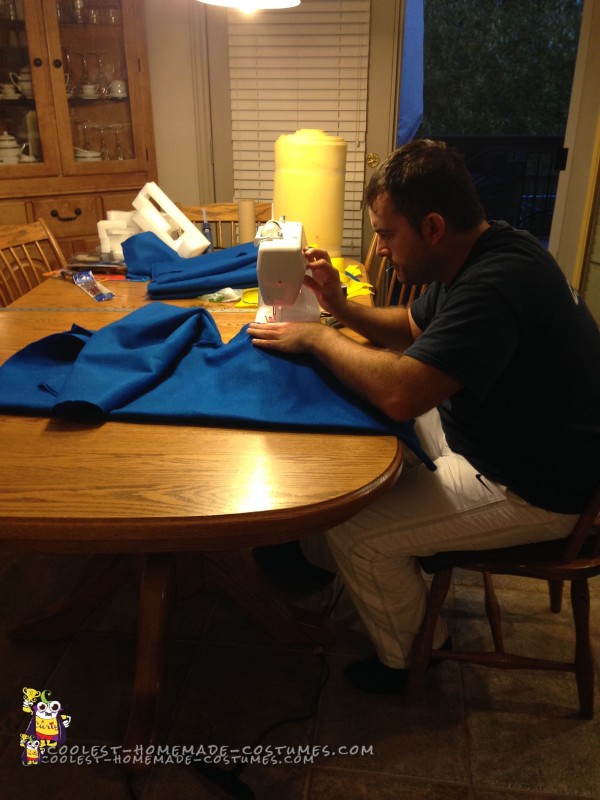
Sewing the Overalls…that’s right I SEW!! ;-)
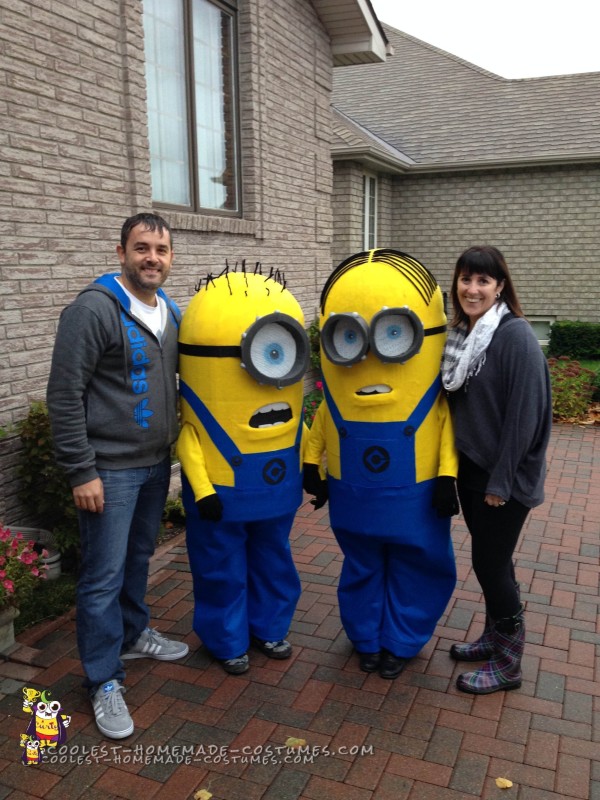
Making of the Minions – Family Picture

Related costumes:
 Creative Tim Burton’s 9 the Movie Costume
  65+ Coolest Homemade SpongeBob Costume Ideas
 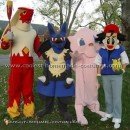 65+ Coolest Homemade Pokemon Costume Ideas
  Make Your Own Awesome Minion Costumes
 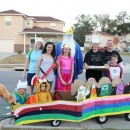 Ultimate Adventure Time Homemade Halloween Family Costume
 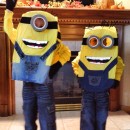 Coolest DIY Minion Halloween Costumes for Kids
  Despicable Star Wars: Return of the Minions Group Costume
 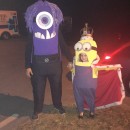 King Bob and Purple Minion Couple Costume