This Edward the Blue Engine train costume resulted in a BIG change in my son’s perception of Halloween costumes.
Halloween is a big deal in my family. We go wild with decorations, spooky lighting, and of course, HOMEMADE costumes. We love it. You can imagine my disappointment when my beloved first born child balked at wearing any kind of costume. No hats, no makeup, no capes, no tails, no weird shoes, nothing. His first Halloween, he cried the entire time he had on his little monkey costume. His second Halloween, I got him a yellow shirt and drew a Charlie Brown zig zag on it and called it a day. His third Halloween, he refused to wear anything but an orange shirt with a jack-o-lantern face on it. WHO IS THIS CHILD?
So along came Halloween #4. I knew if I could come up with the right idea, that he would come around. Or…I hoped anyway.
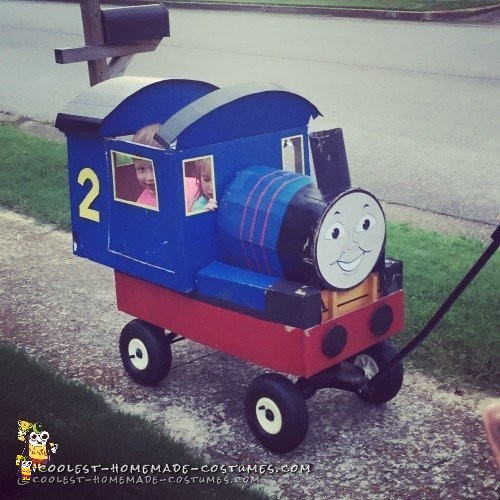
I focused in on what he loves the most. Thomas and Friends. I thought,”What about a train costume?” I scoured the internet for ideas. Almost everything I found was a big bulky wearable box. I knew that he’d wear that for about 8 seconds and then take it off and play with it. Then I found my big break! Thomas the Tank Engine WAGON! With some trepidation, I pitched the idea. He thought about it for a minute, and then I got a glorious, resounding, “Meh, I guess.., but I want Edward.”
HURRAY!
Ok, I (maybe not so secretly) wanted to do this just for the challenge. I’ve always loved to build stuff. Models out of cardboard in college? YAY! Giant wagon train? Close enough. LETS GO!
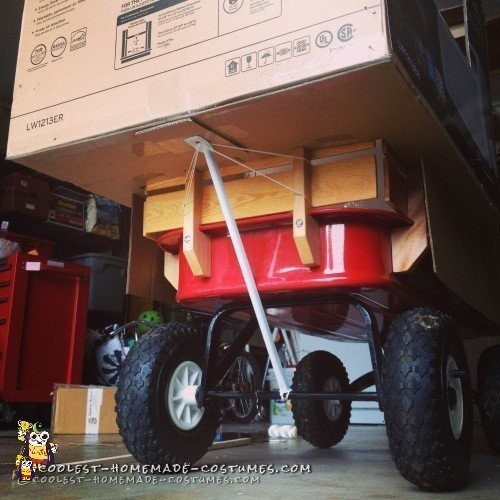
So it was game on. We already had a wagon, and a few big boxes, so I got started. I had a few design challenges right off the bat.
#1. This thing had to be portable. And we don’t have a truck, so the “train” parts had to be easily removable
#2. It needed to be sturdy enough to stand up to a 3 year old. Nuff said.
#3. It needed to actually look like Edward. Duh.
(For the steps following, you can sort of follow along with the pictures as well)
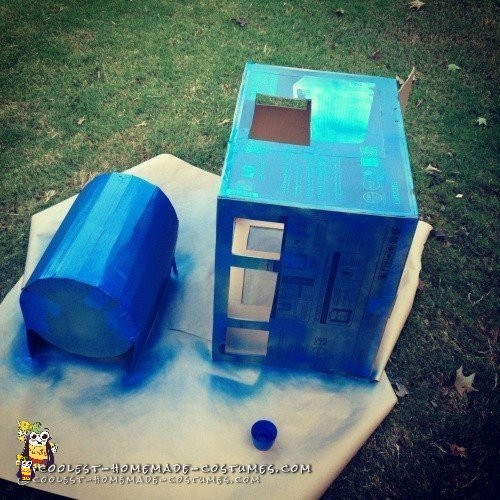
Making the Cab
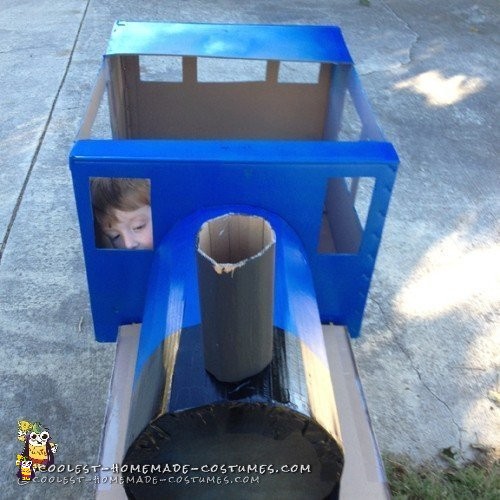
So off to the garage to get started! I found an old A/C box that was just the right size for a cab. I cut a couple of notches in it and it slid right down over the edge of the wagon.
The back of the box was cantilevered out over the back of the wagon, and it needed some support. I found an old shelf support and used some rope and chewing gum (ok, not really) to rig it up to the back axle. Perfect! This part stayed on permanently (until after Halloween anyway) but the box was removable.
Fitting the “cab” box
Supporting the cantilevered box
Boiler and Buffers
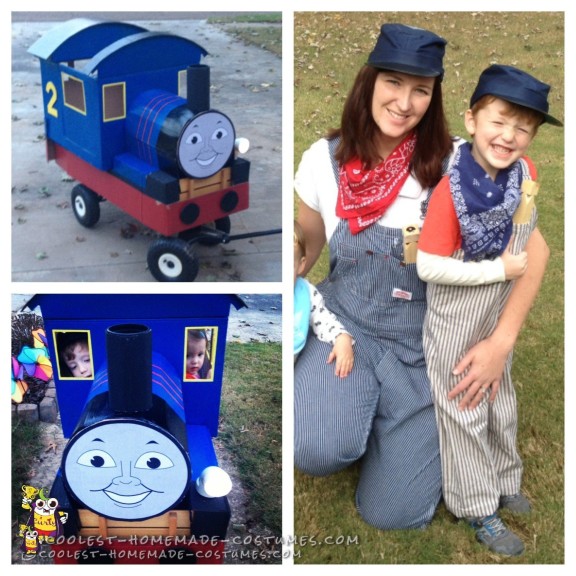
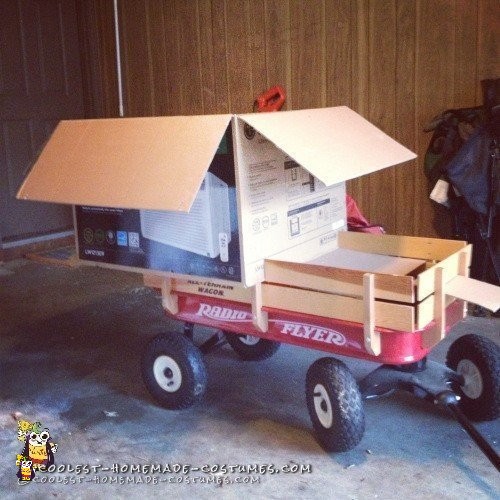
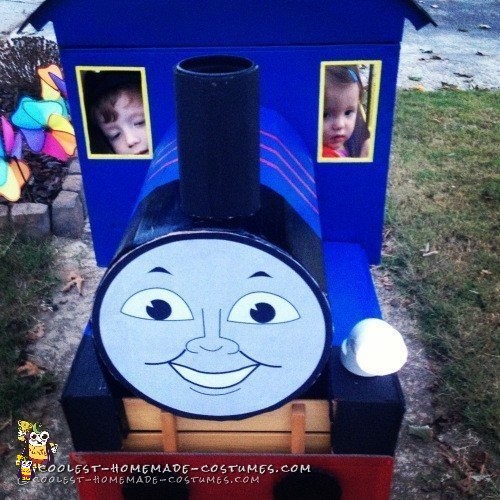
Next I needed a boiler. I took a large sheet of cardboard and scored it with a box knife so that it would curve neatly. I cut out a round piece for the “face” and added a funnel. I sized the funnel so that we could fit a cup inside it and add water and dry ice for “steam”. We never got around to actually using that feature though. I cut out a few windows and the much anticipated door and he was ready to take a ride! It was at this point that I knew I had him. He also announced that he was going to wear an engineer costume!
I added some skirting and front and back buffers, and it was time to paint!
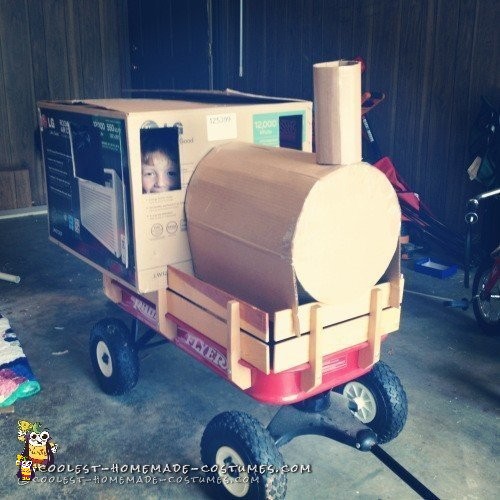
Adding the boiler and funnel
Edward the Blue Engine Painting and Details
It took more paint than I expected, but using spray paint purchased at Walmart, we got him the right shade of “Edward” blue.
We continued to paint and add details (stripes, numbers, etc.) using acrylic paint, and I realized that I really needed to add a roof to the cab for it to look right.
The final details that would bring it all together were the face and lamp. I printed the face on the plotter at work so that we would have one big sheet (yay architecture!), and I spray mounted it on to the cardboard. For the lamp, I used a small PVC elbow joint and glued paper over the end. We put a small headlamp inside and it glowed perfectly.
First coat of paint
trying it out
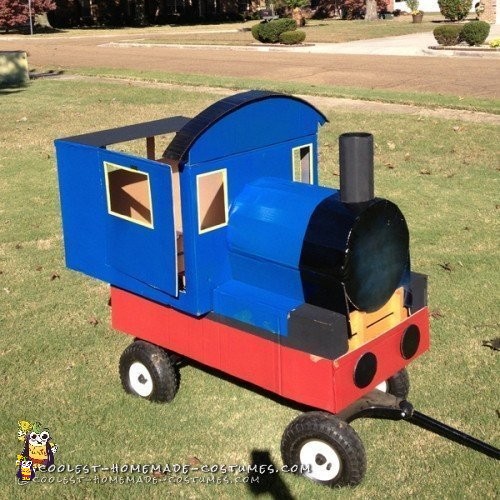
Needs more details and a roof!
Its done!
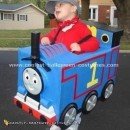
And here we are in our costumes! Somewhere along the line, he decided he wanted to be the “fireman” who shovels coal into the fire box. I was assigned to engineer duty, and thanks to a $3 thrift store find, I was able to take on the role. My mom made his overalls and I got the hats for $1.
Anytime you plan for an outdoor event like trick-or-treating, you’re at the mercy of the weather and of course, that Halloween it rained… and rained… and RAINED. Total wash out. Edward is a lot of things, but he’s definitely not waterproof. Luckily, there was a big trick-or-treat event at Lowe Mill and we were able to take him there.
With Halloween past, we have kept Edward in the garage and he’s played with pretty frequently. The following Halloween, we used him again, and this time (after he had a general hot glue and tape tune up), we added a bell. We did lose the lamp somewhere, but he hasn’t asked to replace it, so it’s all good.
And now its summer 2015 and just this evening, we had the Edward wagon out for a ride. His paint is getting scuffed and chipped, his funnel is loose, and his back buffer has fallen off, but its nothing a little paint, hot glue, and tape can’t fix. And if his current enthusiasm is any indication, we’ll need lots of glue and tape so that Edward will be ready to ride for Halloween 2015.
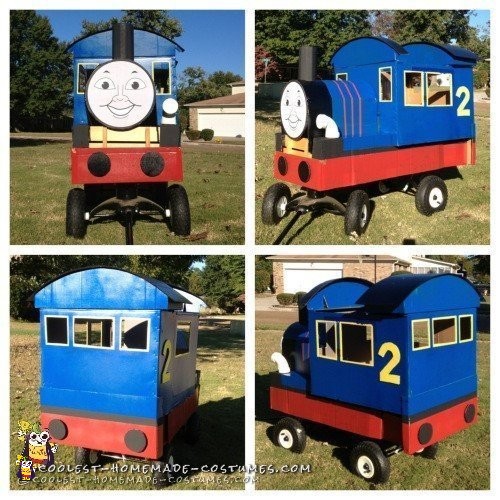
FINISHED!
Kids riding with the lamp on

Our “Engineer” and “Fireman’ costumes
Still rolling 2 years later!

Related costumes:
 65+ Coolest Homemade Thomas the Train Halloween Costume Ideas
  Cool Homemade Costume for a Boy: Burlington Northern Diesel Train
 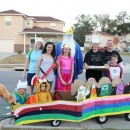 Ultimate Adventure Time Homemade Halloween Family Costume
 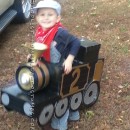 Awesome Halloween Steam Locomotive Train with a Little Engineer!
 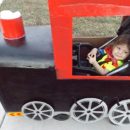 Coolest DIY Train Engineer Stroller Halloween Costume
 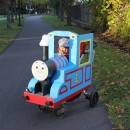 Original Kids Thomas the Tank Engine Homemade Halloween Costume
  65+ Coolest Homemade SpongeBob Costume Ideas
 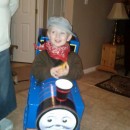 Best Thomas the Train Toddler Costume